Translate

Sunday, November 17, 2013

Mario Lopez in Santa Monica

www.DennisDavisPhotography.com
The Santa Monica 3rd Street Promenade was the setting for television commercial we were shooting for Nescafe Dolce Gusto Coffee makers featuring TV personality Mario Lopez. That August morning dawned clear and bright, and I was eager to spend an exciting day with some very talented people. My assistant Jerry parked the BMW in the underground parking lot, and we walked across the street to where the commercial was being filmed. The blue tents and trucks full of grip and lighting gear made it clear where I needed to go, and I walked up to where we were shooting and greeted the friends I had made the day before shooting in Newport Beach.

The commercial that I was shooting production stills photography for is at http://www.ispot.tv/ad/72ak/nescafe-dolce-gusto-featuring-mario-lopez


Mario Lopez was schedule to serve various flavors of Nescafe coffee to fans who signed a model release form so we could use their image in the commercial. A custom made trailer had been created for the commercial, covered with Nescafe Dolce Gusto logos and filled with coffee and coffee makers. A huge silk perhaps 40 feet across was stretched overhead on four metal legs. This softened and defused the sunlight, which provided much of the light that was to create the video. Two or three large HMI lights were placed under the silk, but were not on when I arrived.
www.DennisDavisPhotography.com

As I began photographing the set and the crew, a protest rally against GMO and Monsanto with about 50 people began chanting and caring signs around the set. I guess they wanted to be caught on film. This chaos was in addition to the live music from the stage a block away, other music coming from stores, and thousands of shoppers and diners. Later in the producers tent I was impressed when listening to the audio track on the video footage that none of the protesters or music were noticeable. The microphones they were using were highly directional, rejecting everything but the conversation about coffee.

About an hour before Mr. Lopez was scheduled to arrive, our crew put up a sign inviting fans to meet Mario Lopez and share a cup of coffee with him. A line formed quickly, and soon about 40 people had signed model releases and were waiting to join Mario on the set.
www.DavisPhotographic.com

I was shooting with a Canon 5 D Mark II with the classic 24-105 f4 zoom on it. I was outside the ropes shooting into the set on tripod during the first hour of the commercial production, however the fans started getting crazy, and the pushing and shoving soon made me move from that spot. I found a high perch out of the line of site of the video cameras, and shot from there.

Mario Lopez was friendly, personable and fun throughout the day. He would often take a moment between video takes to sign an autograph for a fan. He posed for pictures with fans repeatedly throughout the day. One of my favorite pictures I took of Mario Lopez that day was when he did a high five with an eight year old boy. It shows the love he has for people, and how they love him back. I think that Nescafe made an excellent choice as a spokesperson in Mario Lopez. He is professional, hard working, kind, and very handsome! I am honored to have spent two days photographing him for Nescafe, and I love having his images in my portfolio.
www.DennisDavisPhotography.com


The crew members, directors, producers, wardrobe, hair and makeup all worked to make Mr. Lopez and his fans look great drinking a cup of coffee. I really enjoyed how quickly I was accepted as an equal and a part of the team, and how everyone seemed to want to help me get the pictures I needed for Nescafe’s advertising campaigns.

The producer who had hired me told me about her internet search to find the right photographer for this project. She looked on the video and movie production support website LA 411 for photographers listed under heading “Production Stills”, because she wanted someone familiar with video production lighting and sets. Then she went through the portfolios of more than 40 photographers, looking for someone with skills in food photography and still life. She said her Google search was “Los Angeles Advertising, Food, Lifestyle Photography” Three of my websites came up with her search, so she ran into my work again and again. Now with three shoots for Nescafe complete, I have lots more work to put on the Lifestyle, food and beverage advertising pages.


Mario Lopez makes an excellent spokesperson for Nescafe Coffee, he truly seems to love coffee and sells their coffee makers well. He comes across as sincere and honest, as well as fun and sexy. I do not ever drink coffee, but I wanted to buy a Nescafe Dulce Gusto machine when I heard Mr. Lopez sell it!

keywords: Los Angeles Photography, Lifestyle Advertising Photography, Los Angeles Food and Beverage Photography, Extra, X-Factor, celebrities, movie stars, famous people, Mario Lopez, Nescafe, Long Beach Photographers, Los Angeles Food Photographers, Los Angeles advertising lifestyle photographers, advertising production stills, commercial production stills photography, commercial advertising production stills photographers


Sunday, October 13, 2013

Shooting Mario Lopez

Backstage with Mario Lopez for Nescafe

I have never felt more like a part of a team, all of us striving towards the same goal of excellence, as I did on the Script to Screen commercial with Mario Lopez for Nescafe Dolce Gusto Coffee maker.

Film production crews in Los Angeles metro are mostly freelance, working on a TV commercial one week and a movie or TV show the next. The crew I worked with was partly freelance, partly full time staff. Yet I was amazed over and again by the professionalism of the lighting people, the camera operators, the producers, directors, food stylists, hair and makeup, so much talent being focused on one thing; making Mario Lopez drinking a cup of Nescafe coffee look great!
http://www.DennisDavisPhotography.com

On day one of the two day shoot, the electricians and grips had a multi-million dollar Newport Beach mansion with a huge world class island kitchen to light, and the lighting included what was outside the windows as well as inside. One of the most important camera angles being used included looking out a large glass door into a walled court yard with tropical plants and vines and a large fountain. Two large HMI daylight balanced continuous lights, 12,000 - 18,000 watts or more I would estimate by their size, lit the areas outside each window. I looked them up, 12,000 watt Arri HMI lights are around $32,000 each. Reflectors, flags and other gear defused and directed the light. It was an overcast day, gloomy and grey, yet the film crew turned it into a warm, sunny morning out the kitchen windows. Awesome!
http://www.DennisDavisPhotography.com

Indoors, most of the HMI lights I saw were made by Arri, and were round, with barn doors attached, and ranged from 300 to 5,000 Most of the lights had black aluminum foil wrapped around the outside of the barndoors. There was an additional HMI light in the kitchen that had 4 florescent looking tubes about 4 feet long, also wrapped and directed with BlackWrap. The most popular brand of BlackWrap is Rosco Matte Black Cinefoil, highly heat resistant and perfect for shaping light into anything you like. In addition to barn doors, many of the lights sported diffusion domes, warming gels and other light modifiers. Large silks or “cutters” on frames were used to defuse the light like a softbox on a strobe system; however these covered half a wall. All the windows that we were not looking out of with the cameras had black coverings over them, so that the director of lighting had absolute control.
http://www.DennisDavisPhotography.com

They were trying to create a “good morning, how do you want your coffee” feeling to the lighting, and one of the more surprising tools they used was tree branches taped with gaffer tape to the arms on Matthews century stands. The tree limbs created patterns in front of the light, giving it a natural, light through a county manor window feeling. This effect is often created by putting a Cucoloris in front of the light, I have one made by Matthews that is 18” x 24”, metal, and full of random shaped holes created to shape light to look like it is coming through tree leaves. I respect the Script to Screen lighting people for using the real thing, and putting up with the mess from dried leaves on the floor.

I was happy to see a Canon EF 70-200mm f/2.8L IS II USM Telephoto zoom lens mounted on the Canon EOS C300 Cinema EOS Camcorder Body they were shooting with, as have owed variations of this lens for years. It’s good to know that I have good taste! The EF lens mount on the camcorder body allows you to put any of the glass you use on your Canon EOS still camera on the C300 or C500 camcorder. The Canon C300 and C500 look so similar I am not sure if all 3 of the camcorders that they used were one or the other, but I can tell you that the video looked excellent on the monitors with saturated color, crisp and sharp.
http://www.DennisDavisPhotography.com

Working with TV personalities and movie celebrities as the talent in a commercial can lead to all kinds of expectations and wild thoughts the night before a shoot. What would it be like to spend two days working with a famous celebrity like Mario Lopez? Mario Lopez was a child star in the television show “Saved by the Bell”. He appears on “X Factor” and CBS “Extra”.  Spending time with him off camera, talking with him and his wife Celebrity Hair/Make Up artist Courtney Mazza, I learned what a kind and sincere person he is. Mario Lopez has so much energy on camera, he is so upbeat and excited in his on camera presentation, and I could never get tired of shooting him.

Mario seems to love good coffee, and his excitement for the Nescafe Dolce Gusto came across as absolutely genuine and believable. He was the perfect pitchman for this advertising product infomercial, he made me want to buy the Nescafe coffee maker, and I do not drink coffee. I would use it for tea, hot chocolate and coffee for guests.


There were at least 4 rooms with people watching what was taking place on the three cameras on multiple monitors. The client room was where Mario Lopez hung out when he wasn’t on set, along with along with his manager, wife and some of the other talent, wardrobe and hair and makeup people. The Script to Screen Co-Founder and VP/Executive Producer were watching two monitors in a totally dark room along with two clients from Nescafe. If there wasn’t enough foam on the milk in the cappuccino, one of the clients would notice and the Executive Producer would communicate over the radio headset. The director would call cut, and out onto the set would come Food Stylist, Food Stylist Assistant or Art Director with new cups of cappuccino in hand, or refills for the Dolce Gusto coffee machine. Perfection was required and achieved time and again.

As the production stills photographer, my primary job was to capture Mario Lopez on set and back stage, and to create advertising product photography of the coffee maker and the beverages it produced.

When we broke for lunch, I had the set to myself as well as the services of the two food stylists. I had 30 minutes to capture 8 drinks being made. HMI video production light levels are much lower than that of strobes. I had to do shots of the Dolce Gusto machine with milk or coffee flowing into the cup. With strobe I would normally be shooting at ISO 100, shutter speed of 125 or 160 and an aperture based upon how much depth of field I want. With HMI video lights I was shooting at 800 ISO, f2.8 and 1/60 of a second shutter speed to stop the action of the flowing milk, coffee, chocolate or other liquid pouring from the machine into the cup. However, once the drink “settled” and the layers in the milk and coffee appeared, I switched to 100 ISO, ¼ second at f2.8. This was to reduce the noise or grainy feeling in the image, and allow it to be enlarged further. To see more images from this shoot, go to http://www.DennisDavisPhotography.com

keywords: los angeles advertising photography, Los Angeles Lifestyle photography, food photography, beverage photographer, nescafe, Mario Lopez, Xtra, Xfactor, TV, advertising photography,


Monday, September 30, 2013

Eight Reasons to Live in Alaska

www.EagleRiverHomes.com
The people that live in Alaska are some of the toughest, most independent individuals you will meet, yet honest, helpful to their neighbors and friendly. Why are they willing to endure the long winters and cold? Here are the top 8 reasons to move to Alaska.

1.      Quality of Life. Alaska offers a lifestyle with very little traffic on the freeways, huge inexpensive homes on large pieces of land, clean air, clean water, good schools and is an awesome place to raise a family. It is a slower, more relaxed pace.

2.      Alaska, the Final Frontier. Many parts of Alaska remain unexplored. There are mountains and waterfalls that are unnamed. Vast areas in Alaska have no roads, and can only be reached by boat, horse, sled dogs, hiking or plane. It is more than twice the size of Texas, and there are forests, glaciers, mountain streams, waterfalls, lakes, islands, mountains and tundra for you to enjoy.
Photography by Dennis Davis
DennisDavisPhotography.com

3.      Sportsman’s Paradise. Hunters have big game like moose and bear to hunt, but also wolverines, caribou, mountain goats, wolves, and musk ox. Fishermen can fish everything from Salmon and Arctic Char to Lake Trout or Halibut.  The town of Homer, AK is known as the Halibut capitol of the world. Some of the best hunting and fishing in the world is in Alaska, and if you are willing to go out and get it, you can have plenty to eat without going to the store.

4.      No State Taxes. Alaska has no state taxes, and many cities have no sales tax. Revenues from the oil pipeline have allowed Alaska to do away with state income tax. In addition, they state government has enacted the Permanent Dividend Fund (PDF) which allows residents to receive $300-$2,200 a year from the state’s oil revenue. 
www.EagleRiverHomes.com

5.      The Never-Ending Adventure. If you enjoy change, excitement, travel and interesting experiences, Alaska is your new best friend. Snowboarding, cross country skiing, mountain climbing, flying, biking, and hiking – the wilderness never ends, and so adventure is just outside your door.

6.      Photographer’s Dream. Landscape photographers could spend their whole life capturing the mountains, lakes, rivers, glaciers, forests, oceans, islands and other landscape features in Alaska, and never get bored. Wildlife photographers can photograph wolves, lynx, moose or Dall sheep in breath-taking, natural settings. Lifestyle photographers can capture rugged, athletic people enjoying the outdoors. Everywhere you point your camera is a beautiful picture, and fine art photographers never run out of inspiration.

7.      Easy to buy Property. The American Dream to own your own home is out of reach in many parts of the United States. The same three bedroom house on a one-acre lot that would cost over $1 million in Los Angeles could cost $195,000 in Alaska. $330,000 is the average cost of a 3 bedroom, 2.5 bath house with a two car garage in the Anchorage area. There are many first-time home buyer programs, low income loans, single parent loans, etc., to make it easy and attractive to move here.
www.EagleRiverHomes.com

8.      The People. There are only 731,449 people living in the entire state of Alaska as of 2012. That is less than many people in Los Angeles or New York has living within a mile of them. The low population makes for a small-town community feel throughout the state. People greet each other on the street. Families are important units, and family gatherings are a regular thing. People take the time to be courteous at the stoplights and on the freeways. The people in Alaska are more independent, adventurous, kind, generous, helpful and hard working than many other states I have visited. Homeless persons and people that make begging a career tend to travel south, where sleeping outdoors is more comfortable. Lazy people don’t like it here; there is too much work to do. That leaves lots of people you would like to get to know as friends, all over Alaska.

I am visiting Alaska for the second time in my life, and I have to say I love it. I live in Los Angeles with an ocean view apartment. I can walk to 40 restaurants, 6 grocery stores, coffee houses, bars, churches, schools and almost anything else I could want. However, there is never a time in my home when I cannot hear traffic noise, TV, music, fire trucks, and other sounds of the city. Peace and quiet difficult to come by.


As I write this article, I am looking out the window at a snow covered mountain peak. I am in a beautiful large home surrounded by a forest of birch, spruce and cottonwood trees.Chickadees and Stellar Blue Jays take sunflower seeds and peanuts from the bird feeder on the deck, where a warm fire waits for me to join my family members talking and enjoying snacks and drinks. This is paradise, and it amazing that unspoiled wilderness property is still available for sale at affordable prices in Alaska. To learn more, contact my niece Cindy Wilson at http://www.EagleRiverHomes.com

Keywords: Real Estate, Alaska property, Anchorage homes, Eagle River property, Eagle River Homes, Alaska Adventure, Alaska Travel, Alaska Airlines, Alaska Cruise, Alaska Photography, National Parks, wildlife, quality of life

Friday, September 20, 2013

Alaska Wilderness Photography

Commercial Photographer Goes 
Wild in the Alaska Wilderness
www.EagleRiverHomes.com

This is only the second time in my life to visit Alaska, and my departure date is September 27th, one week away. The excitement is building; this is going to be big! This is a place that’s twice the size of Texas, but has about the same amount of people living in the state, (731,449) that live within 5 miles of me in Long Beach, California. That’s a whole lot of wilderness, and lots of room to meet moose, bear, wolves, caribou and many other wild animals. I can’t wait!

The first time I saw a moose in Alaska I could not believe how huge the thing was. It was walking on a train track near Eagle River, AK, and my head would not have reached his shoulder. The largest of all the moose races is the Alaskan subspecies (A. a. gigas), which can stand over 2.1 m (7 ft) at the shoulder, has a span across the antlers of 1.8 m (6 ft) and averages 634.5 kg (1,396 lbs) in males and 478 kg (1,052 lbs) in females. The largest confirmed size for this species was a bull shot at the Yukon River in September 1897 that weighed 820 kg (1,800 lb) and measured 2.33 m (7.6 ft) high at the shoulder.

Like me, the moose is a vegetarian. However an adult moose needs to consume 9770 calories per day to maintain its body weight. That’s about 5 times the calories that a human eats, and if I eat that much, I would be the size of a moose! Their diet is mostly fresh shoots from trees such as willow and birch. They also eat aquatic plant life in lakes and rivers. In winter, moose are often drawn to roadways, to lick the salt that is used to melt the snow and ice. This leads to many car / moose accidents in Alaska.

I will be posting pictures on this blog from my Alaska Wilderness Adventure from September 29 – October 5. Although there are only about 150,000 moose in Alaska, I hope to photograph a good number of them here for you to see. Watch for images of pristine lakes, majestic mountains, blue ice glaciers, and tundra, and animals, lots of animals.
On the other hand, I will also be posting lots of pictures of the wild and rugged people in Alaska, including my nieces and their families. I am shooting lifestyle advertising photography for my niece Cindy Davis Wilson, to use on her Alaska Real Estate website http://www.EagleRiverHomes.com if you are buying or selling property in Alaska; Cindy Wilson is who to see. So watch for people pictures as well as wilderness and animals.

So what would you do with a 10 day visit to Alaska? Where would you go? Would you go dog sledding, on a cruise ship around the harbors? Denali is the highest mountain in North America, with 20,156 feet (6,144 meters) in height, creates its own weather patterns. Do you want to see bears, lakes, forests, natives, towns – what would you want to photograph, and what would you want to see? Follow my blog, and experience Alaska Wilderness from your Laptop.

Keywords: Travel Photography, National Parks, Landscape photography, Alaska, Alaska Wilderness, moose, animal photographers

Tuesday, August 6, 2013

Models on Manual

Models on Manual – A photography workshop for learning to use a DSLR on manual settings, and learning to control light while shooting models. 

$89 for two three-hour classes, limited to 15 students

From a photography class I taught in Denver with 80 students

Two Classes, Sunday, August 18, 2013 at 9:30 am and Sunday August 25 at 9:30 am
Class is held at 1055 E. Ocean Blvd., # C, Long Beach, CA 90802 and at the beach
Call 213-434-3344 to Register

New York Models, shot in Long Beach
with reflectors

Session one – Natural light and reflectors

Natural Light portrait, using 2 reflectors

Using only one reflector and window light, we will pose models next to various windows in our daylight photography studio. The soft skylight highlights the hair and the side of the face, while the light from the reflector lights the eyes and the front of the face with soft, natural light. We will try shots with slow shutter speeds and wide open apertures at 100 ISO on tripod, then move to 500 ISO, faster shutter speeds and discuss the depth of field benefits of large apertures vs. smaller ones such as f11 or f 16 for shooting models.
Natural Light Headshots
www.DennisDavisPhotography.com

We will pose the models on the natural wood floor, on muslin backgrounds and in the 1950s style room with an ocean view. We will shoot them using one or two reflectors. We will also shoot them with a window in the background, and we will adjust the shutter speed and aperture until the view outside is totally blown out and the light looks good on the model. During session one, we will discuss the mathematical relationship between ISO, shutter speed and aperture size. The shots are put on the screen and we discuss them.
www.DennisDavisPhotography.com

The “sunny f16” rule. The correct aperture for a brightly lit subject in full sun is the ISO speed matching the shutter speed at f16. We will explain what that means, and how to apply it to the beach, where we will be going next. We will learn to use the histogram on the back of the camera, learning what it means when the histogram data touches the right or left side of the chart, or if it peaks at one side or the other.
Natural Light Headshots, taken across
the street from our Photography Studio.

We cross Ocean Blvd, go down the steps at Third Place and take our models to the beach! Here we will continue using our cameras on manual settings, exploring the sunny f16 rule on the beach. We also pose the models in the shade with various trees and plants in the background, and talk about how sunny f16 rule becomes “shady f11 or deep shade f8 rule” as a starting point for bracketing when shooting models on manual. We explore shooting models with various lighting and background combinations, such as in front of the ocean, sand, boats, the Queen Mary, islands, yachts, restaurants, etc. All using natural light, reflectors and manual settings on our cameras.

We return to our daylight photography studio to download our image files and talk about the best techniques for editing the RAW images in PhotoShop. We demonstrate how to find a good white balance, and how to have clean whites without over exposing the image and blowing out the details. We give the models their CD ROM disks, their money and thank them for signing the model releases.

Session Two – On camera flash, Studio Strobes and Continuous lighting


We light our models with classic studio lighting setups, which could include standard headshots lighting with a hair light, fashion lighting with a beauty dish, rim lighting, side lighting and butterfly lighting. We look at the camera histogram as we change aperture settings and strength of the strobe output.

We will pose the models in various areas of the studio, and mix flash with daylight to create a commercial looking environmental portrait. We will look at our portraits in PhotoShop and talk about which camera RAW adjustments make them look better.

We will walk with our models across the street to the beach, and we will take a 1,000 watt second battery strobe on a light stand, as well as on-camera flash. We will mix sunlight; reflectors and strobe fill to create pleasing outdoor portraits of models in manual mode with our DSLR cameras.

We will return to the studio and download our pictures, comparing work and creating disks for our models, which have signed model releases and are waiting to be paid.


We finish with a discussion about how to start a photography business, what type of lighting gear and camera equipment to buy, and how to market a photography business through social networking.


Keywords; long beach photography, photography classes, #photographtips, #photography, #photographyclasses, photography classes in Long Beach, Photography workshops in Long Beach, famous photographers, Dennis Davis Photography Instructor, Dennis Davis Photography Teacher, 

Monday, August 5, 2013

Long Beach Corporate Headshots Photography

Long Beach Corporate Headshots Photography Natural Light Studio
Dennis Davis Photography


Our Natural Light Business Headshots Photographers Studio is across the street from the beach, so it’s a great place to get a corporate headshot with studio lighting, then a totally different look with natural daylight, then a totally different look with a natural light environmental portrait, followed by – you guessed it – we do beach headshots. We have a corporate headshots package to fit help you sell your brand, your smiling face! Some people believe a corporate headshot is more important for a company’s website than the logo, when choosing one company website or real estate agent business card from another. It’s all about the eyes; do they look friendly, genuine and happy? The smile, is it comfortable and happy, or stiff and forced? The Headshots photographer that delivers a great corporate headshot from a busy, overworked executive is a talented person. Do you need to sell yourself through your corporate headshots portrait?

Call Dennis Davis Photography at 213-434-3344


Corporate Headshots Packages – In our Long Beach Natural Light Studio

Executive corporate headshots package, 5 Looks - $295.00


Studio lighting, highlighting the hair
Pick from muslin or seamless paper backgrounds, environmental portraits in the studio, and between strobe lighting and natural light. We cross the street and do headshots at the beach with the ocean or with plants and trees in the background. Change outfits, settings or backgrounds up to 5 times.

This package includes over 100 pictures taken and burned unedited to your disk, and 10 final images color and exposure corrected. Your favorite corporate headshot will be lovingly airbrushed and retouched in PhotoShop for up to 10 minutes, removing any horrifying zit that broke out on your face only moments before you sat before the camera. Your final images can be emailed or sent to you via ftp, or burned on a disk while you wait. 5 looks, $295

3 Looks - $195.00

Our 3 looks corporate headshots package helps you sell the most important part of your company’s brand, your smiling face. What would your company website be without a portrait of you? Dennis Davis Photography can bring out the best “happy to meet you” smile for your business headshots, and help you sell yourself. With our 3 looks corporate headshots package you may change outfit and background combinations up to three times. You may choose from muslin or seamless paper backgrounds, environmental background near windows in our natural light studio, or we can cross the street to the beach for outdoor beach headshots.

DennisDavisPhotography.com
This package includes over 60 images taken and 5 final images will be color and exposure corrected. All the images will be burned to disk or sent to your email as requested.

In and out headshots - $95.00

Our fastest headshots package for busy people on a budget, one background, one outfit. We shoot 30 image, you pick your favorite 3. The whole process is normally over in 30 minutes if you can make up your mind which 3 you want, because there are so many good ones! In and out headshots package, $95.00

Call Dennis Davis Photography, 213-434-3344

Corporate Headshots on Location, anywhere in Los Angeles or Orange Counties

First location corporate headshot, $425.00, $100 for each location headshot afterwards


Natural light headshots
Natural light environmental headshots

Natural Light environmental portraits


Studio lighting headshots
Natural Light Headshots


Natural Light environmental headshots

Thursday, June 20, 2013

Corporate Website Photography

Corporate Website Photography – The battle for customer’s attention. 

DennisDavisPhotography.com
Your company website is the first impression most people will have about your business. How many chances do you have to make a first impression? You have 3-10 seconds before they click on the completion’s link.  So does the corporate website photography on your business website make your clients say “wow, I want to work with these people?” Not if it is the same stock photograph they just saw ten minutes ago, and first on your competitor’s business website! You are in a war for the eyes, mind and attention of everyone with an internet connection and a desire for what you are selling, so what sales tools are you using to convince them to buy – stock photography and words? Click, next website.

If your business website photography looks “same old, same old”, different day, same stuff, do you really think your potential clients are going to stay on your home page or click the search engine link to the next site? You have to show your own advertising product photography, the food photography from your restaurant, the machines in your aerospace plants, the executive headshots of your people, not the same generic pictures that are used for half the businesses in your industry. If you did all that work to get clients to your web page, why are you going to show them something that won’t hold their attention? This is war! Click, next website.
Dennis Davis Photography


Choosing the right commercial photographer for your business website photography is no easy task. So many business people fail here by picking someone cheap and easy, like Uncle Larry’s friend that does weddings, or Chuck’s son that is a photography studio at the community college. But you don’t need pictures of a wedding or student experimentation, you need pictures of a fork lift driver, a bottle of soda, a plate of pasta, the inside of your company’s warehouse or your CEO. Do you think that anyone with a camera can produce images or video that will hold the attention of today’s web savvy clients? You are losing the battle. Click, next website.

Business photography for websites requires three primary things from the photographer;

  1. A sparkling, witty and fun personality, but a person clearly in charge and confidant that the pictures will be the best possible. You can’t get your subjects to smile unless they are happy and like the photographer.
    DennisDavisPhotography.com
  2. Technical skill and experience, an understanding of light, composition, color, design and can effectively apply all of that to their own equipment. Studio style lighting with lights on stands make a corporate website photography shoot look professional, bright and clean. This is not a job for a guy with an iPhone.
  3. The eye of an artist, a photographer with their own “style”. When you look for a photographer, look at their photographer’s website portfolio and ask yourself “do I love this work? Do I wish I had taken this picture?” If you are amazed at the artistic ability of the commercial photographer when they are shooting the kind of subject you need photographed, then hire them. If they are only good with flowers, brides, small children and sunsets then keep looking.

You see, if the same photographer shoots all or much of your website, that style and look will be consistent throughout your company website. If you love that style and look, then at least some of your clients will too. However, if you are using stock images pulled from everywhere, each with a different look, style and feel, what you are communicating about your company is “we are cheap, confused, and our website designer was just diagnosed with schizophrenia.”  Sorry, you just ran out of lives, game over. Click, next website.
Dennis Davis Photography


Often it takes a photographer 15 or 20 years to develop a “style” or look that is all their own in the areas they specialize in. Website photography specialties such as architecture photography or food photography are very difficult, and require years of practice to produce images worth publishing in a magazine or on your company website’s home page. Advertising product photography needs to be bold, exciting, with saturated colors. Lifestyle advertising photography needs to show attractive people having fun with your product or service. All of these specialties require controlled lighting, and good architecture photography can use up to 15 lights in one large room.

Food photographers have to shoot the food within moments of leaving the chef’s hands. Within 1-3 minutes after putting a beautiful plate on a table to photograph, whip cream runs, wet food dries, fried food becomes greasy-looking, ice cream melts, and steaming food doesn’t. Sometimes the photographer only gets off 2-3 shots before the food is no longer at its photographic best. And you are going to try this with a wedding photographer? What kind of “style” do you think will show through from their total lack of experience with this subject matter, for anything except wedding cakes? Click,next website.
www.DennisDavisPhotography.com


Before making a financial decision involving photography for your company website, think about ROI:

If I put three times as much thought and money into the photography, video, website design and copy writing of my company website, and really told a story in an exciting and captivating way, would my potential clients spend three times as much time on my corporate website, considering my products or services? Would I make three times as many sales? Would this be a good investment of my time and resources?

Isn’t it time you considered finding the best commercial photographer in their field, instead of the cheapest one you can find?

Keywords: Los Angeles corporate website photography, Long Beach business photography, California website photographers, Orange County website photographers, Long Beach business website photographers, Southern California website photography, Torrance, Glendale, Burbank, Hollywood, Santa Monica, Irvine, Anaheim, Costa Mesa, Huntington Beach, Long Beach, Los Angeles, Venice, website photographers, business website photographers, Dennis Davis Photography, Davis Photographic

Tuesday, June 4, 2013

Free Introduction to DSLR Photography Class

A class for begining photographers with DLSRs

Sunday, September 1st, 2013 at 9:00 am -10:30 am
Studio address; 1055 E. Ocean Blvd, Long Beach, CA 90802

www.DennisDavisPhotography.com

Dennis Davis Photography Studio is offering a free introduction to your digital single lens reflex camera class. You should bring a camera with removable lenses (DSLR) to the class and a tripod if you have one. The class will begin in our natural light studio, where we will talk about reflectors, and the relationship between shutter speed, aperture, ISO. We will photograph each other in manual mode in the studio.

Next we will walk across the street to the beach and shoot at the ocean. The class will cover an introduction to shooting in manual mode, including controlling your shutter speed, aperture, ISO. This is a beginner’s class, and will cover the most basic concepts of exposure, depth of field, composition, controlling light and focus. This class is free but limited to 15 students. Please call 213-434-3344 or email davis@davisphotographic.com to check to see if this class still has openings, or if new dates have been added. 

Friday, May 3, 2013

Advertising Product Photography – Light and magic, smoke and mirrors

www.DennisDavisPhotography.com

Making great advertising photographs for products is not an easy task. A client brings you an object - a jar of face cream, a toaster, a hair brush – and wants you to make it look like a space ship or 10 million dollars. This picture has to stop people from turning the page or hitting the next button when they are browsing magazines or the web.

 Props and backgrounds

http://www.DennisDavisPhotography.com
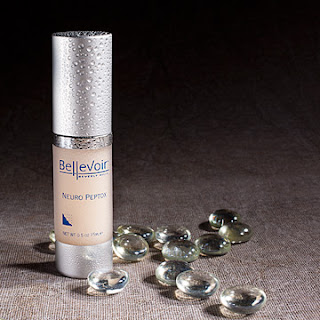
One way to make to make your $5 wallet look like more is to put a set of expensive car keys next to it. Putting your product in an expensive looking setting is one way of making it look like it is worth more. A trip to an arts and craft store will land you lots more props that are useful for product photography. Glass beads, pebbles, crystals, flowers and plants, marbles, paint, art paper and so on can be used as props and textures. I keep a collection of 30 or so pieces of fabric in the studio to use as backgrounds or to add to a set.


The most commonly used background for product photography is black or white Plexiglas. Usually reflective or glossy finishes are used, but satin or matte finish can work as well. Black Plexiglas creates a dramatic surface with no distractions, and the reflection of the product can be as interesting as the product itself. The problem with reflective backgrounds is they reflect your lights as well. Remember this principal: angle of incidence equals angle of reflection. If you bounce a ball at a 45 degree angle off of a wall, it will bounce away from you at an equal 45 degree angle. If you stand in front of a wall, and throw the ball straight at the wall, it will bounce back and hit you in the stomach. The same applies when lighting a product on a shiny


background. You cannot place lights directly overhead, or directly opposite the camera behind the product as these locations will result in reflections.

Shooting shiny products

Glass, metal, plastic – many products are made of reflective materials, and your lights, light stands, camera, tripod and face can reflect in the product, making your image useless or require extensive retouching. I have a client that makes a soft drink with printed shiny plastic film covering the bottle. It does not reflect the objects in the studio, just the shape of the lights themselves. To avoid these reflections, I shoot the bottles in a cocoon. Cocoons are tent-like boxes made of white fabric and metal rods. The fold up for storage, but can be lined with background paper and used to reduce reflections in shiny products. I normally put three softboxes above and to the left and right of the cocoon. The cocoon defuses the light, and reduces the number of reflections seen in the product.
http://www.DennisDavisPhotography.com

Mirror Paper

I like using colored mirror papers, sometimes called Mylar paper, as a background surface for a product that could benefit from a reflection. These papers come in silver, gold, red, blue and green in my art store. These colors can add fun and excitement to a product, but they are a photographer’s challenge. You cannot place a light overhead or behind the product, or the mirror-like surface will create ugly reflections from each of your light sources. If the paper is curled or curved, it will reflect every light facing that curve. The paper scratches with ease, so be careful when you buy them in the store that you are not buying a scratched up piece.

Reflectors

At times I use white cardboard reflectors or small mirrors for still life photography, but the silver Mylar cardboard reflectors are my favorite. You may make your own reflectors from “mirror paper” sold at art supply stores, or purchase them from Light Right, at http://www.lightrightreflector.com/ The advantage of Light Right reflectors is that they have a magnet on the back of the reflector, and a piece of metal on the other flap. This magnet setup allows the photographer to change the angle that the reflective surface picks up the light and bounces it back.

Using light subtraction to create shadows and mystery

Where light is not in a picture is just as important as where it is. The whitest area of a picture is what draws your eye to it first, however, without the contrast of the dark; an all white picture would be boring. Put rich, saturated colors up against dark backgrounds and they pop! There are several useful tools for controlling where the light is not in your pictures.


  • Softbox grids are cloth square web that attach to the front of the softbox by Velcro. The grid directs the light all in the same direction, rather than being scattered and defused everywhere. If you use the edge of the softbox to light your subject it is called feathering, the effect is even stronger when a softbox grid is in place, lighting one area of the subject softly with a rapid fall off to darkness.
  • Reflector grids are round metal honeycomb disks that come in 10, 20, 30 and 40 degree ratings. The number reflects the size of the honeycomb holes in the grid, letting out more or less light 10 degrees being narrow and 40 being wide and lighter. These reflector grids allow you to direct the light from your reflector head to a particular product or area of the set to spotlight it, leaving the rest of the set in darkness.
  • Flags are cloth stretched around metal frames, and are available in black, white, silver, gold and zebra. All the colors except black are for reflecting or softening light, but the black flags are for blocking light. If you want to keep reflections off of a background or product, a flag is often the perfect solution. My flags come from Mathews, the company that makes century light stands used in the movie industry.

  • Cinefoil by Rosco is a thick black aluminum foil that can be wrapped around light heads or reflectors to create custom openings to put light only where you want it, and keep it from where you don’t. This product is also available in generic versions, but make sure you get thick foil that is heat resistant, or you could melt foil on your light heads. 


Light control is the key to good product photography. Putting light where you want it and keeping it off where you don’t is what the lighting tools are built for. Learn to love light, embrace it, control it and make it do what you want. Products are for the most part, boring. With your impressive lighting, backgrounds and props you can make them into magical objects of desire, which will get you paid.

Dennis Ray Davis is a Long Beach, California based photographer specializing in photography for business. Call 213-434-3344, or see

http://www.DennisDavisPhotography.com ,

keywords: Los Angeles Product Photographer, Long Beach Product Photography, Los Angeles Product Photography, Los Angeles Jewelry Photographer, Product photography, Los Angeles shoe photographer, shoe photography, tabletop photography, small product photographer, California product photographer, how to do product photography, product photography lighting, learn about product photography, Torrance product photography, San Pedro product photographer, Orange County product photographer, Costa Mesa Product photography, Anaheim product photography, Irvine product photographer, Hollywood product photographer, Hollywood product photography, Burbank product photographer, Glendale product photography, Beverly Hills product photographer