Translate

Wednesday, September 15, 2010

AmTrak LifeStyle Photography


DennisDavisPhotography.com

www.DennisDavisPhotography.com


Amtrak to Santa Barbara

A "How to" blog about location LifesStyle Advertising photography.

In March, 2010 I got a phone call from an Amtrak employee asking for a quote and my interest in shooting a two day project for their brochures and photo library. The shoot would be at Los Angeles Union Station on day one without models, and on the train from Los Angeles to Santa Barbara with 10 models. As we talked about the project, I became more and more excited about the artistic and portfolio possibilities of the project, but I knew I was in for one of the biggest challenges of my 30 year photographic career.

We would be shooting in Los Angeles Union Station, one of the top three busiest train stations in the US. We would be shooting passengers as models recruited on the spot, with hundreds of other passengers seemingly bent on getting into and ruining our pictures.

It was one of the most difficult, but rewarding photo shoots of my 30 year career. Difficult because I had to light and shoot models (but with no room for light stands during much of it) on a moving train with Amtrak employees and passengers bumping into me. Rewarding because I was able to shoot in the beautiful and amazing Los Angeles Union Station. It involved ten models, two assistants, 15 locations, 4 Amtrak managers, multiple conference calls, and me to pull it all together.
Casting for models consisted of invitations sent to over 40 models on www.ModelMayhem.com and an open casting for models over 60 years of age on www.CraigsList.org. Casting calls were held in various Hollywood area Starbucks. We were not given a budget large enough for agency models, and preferred models with some acting ability.


Day one was at Union Station, where we recruited real passengers to interact with Amtrak employees. We shot people buying tickets, red caps helping with luggage, the first class lounge, and various "beauty shots" of employees. The best shot of the day was in taken in a large hall that used to be used for ticketing, but is now rented out for movie and television production. It has ceilings that soar almost 70 feet, with arched windows that go almost the full height of the room. We put three conductors in full uniform in a patch of sunlight, filled the shadows with two strobes, and came away with a timeless image.

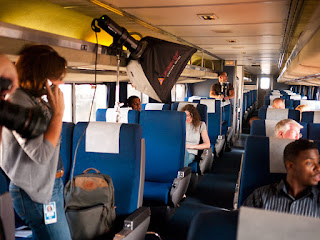
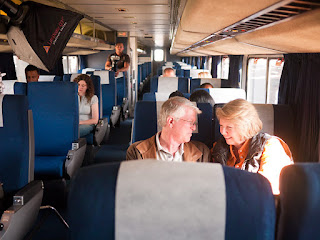
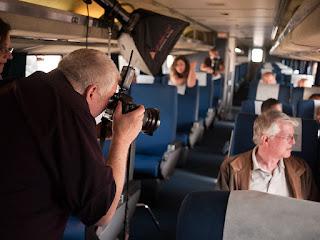
Day two on the train was intense! Up at 3:45 AM, at the train station at 5:00 AM, shooting on the train started at 6:00 AM with the models. We wanted to get as many shots finished as possible that didn't require scenery, as when the train pulled onto the platform at 10:30 AM to go to Santa Barbara, it would fill with passengers. The aisles on in most areas of the train are 30 inches wide, so there was no room for light stands at most locations. My two assistants held ProFoto Mono lights with softboxes up in the air, while others were placed on seats or bounced off the ceilings.


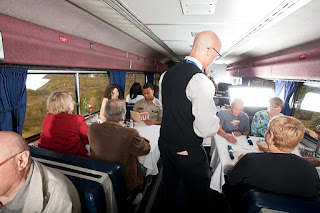
The crazy part came as we approached the station in Santa Barbara. We were shooting in the dining car, as it had very large windows, and we wanted to capture a view of the ocean behind the models. We only had a 10-15 minute time window when the ocean would be fully visible, so we had to get it right the first time. About 45 minutes before we got to the ocean view, the dining car was half full. Our models, assistants and gear was taking up about 6 booths.

The dining room wait staff told us we had to empty more tables, as they needed to seat the passengers for lunch. As we approached the ocean view, we were down to one table, and had to send the other models to another car. There was no longer room for the studio lighting with full size softboxes, as the assistants had to stand in the 30 inch aisles with passengers and waiters trying to go around them! I had just purchased two radio controlled Pocket Wizards, a new version that can control on camera flash units.

I used two hand held Canon 580 flash units, on camera, the other bounced off the ceiling, to light the models and fill the shadows coming through the windows. The entire time I was shooting the segment with the ocean view, there were waiters and passengers bumping me from behind. They weren't being rude, there's just not much room in the dining car aisles, and I am a big man! Although it was one of the most challenging shoots of my career, the resulting images made me feel like I had done a good day's work.

Picture One
This picture works on several levels. It is an architectural image, a corporate image and could be nudged a little and be used for advertising. The sun coming through the windows was the key light, and I didn't want to take away from its beauty, I only wanted to add a little detail with fill lights. There were three ProFoto compact flash Monolights used to light this image. A head with a softbox was placed against the wall on the left side, filling the wall on the left and the front of the four men. A second light with a bare 7 inch standard reflector was placed against the back wall and pointed at an angle towards the ceiling. This provided light for the ceiling and back wall, and overall fill. The final light was immediately to the right of the men, just out of frame, and was a 7 inch reflector with a 10 degree grid. This added detail to the right side of the men, but had to be kept at low power to keep from taking away from the sunlight. Canon 5D Mark II, ISO 100, f13, shutter speed 1/5 sec, Gitzo carbon fiber tripod, lens EF 17-40 mm f4 USM.

Picture Two
LifeStyle Advertising Photography by
DennisDavisPhotography.com
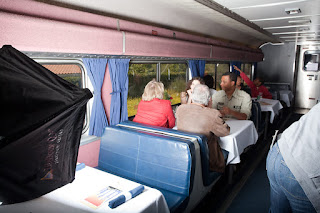
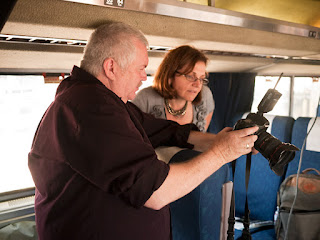
In lighting illustration A you can see the soft box used behind the subjects, lighting illustration B shows the crowded conditions and the softbox bouncing off the ceiling. The second softbox shown in illustration B was directly across from the models near camera position and bounced off the ceiling, and a third light with a 7 inch standard reflector was placed to the right of the models and bounced off the ceiling. The shutter speed and aperture was altered to match the sunlight out the window, and the sunlight was also used as backlight for the models. Canon 5D Mark II, ISO 400, Shutter speed 200/sec, lens 17-40 mm f4 USM at 19mm, aperture f8.

Lighting illustrations were taken by an assistant with a point and shoot camera.

Picture Three
Dennis Davis Photography


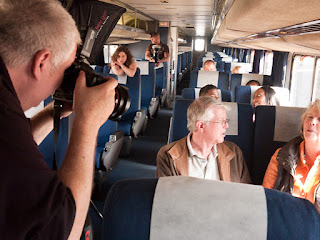
Picture three was done while we were still at the train yard, before the train went to the platform to load on passengers. This is why you can see a light stand in lighting illustration A, and it was the only location where we were able to fit a light stand - the rest of the locations required that assistants held the lights. Three lights were used, the first pointed at the models in the foreground of the picture, the second aimed at the models in row two, and the third was as 7 inch reflector bounced off the ceiling about 6 rows back. Camera Canon 5D, RAW, Aperture f16, ISO 640, Shutter speed 100/sec, Lens EF 17-40mm f4 USM

Picture Four

Lighting illustration C and D show the location of the 2 softboxes used for this image, the third was a monolight with a softbox bounced off the ceiling in the back corner of the car . Canon 5D Mark II, Lens EF 17-40mm f4 USM, f8, shutter 1/200 sec, ISO 400.

Picture Five

About 15 minutes before arriving in Santa Barbara, beautiful ocean views appeared out the left side windows of the train. It was about 12:30 P.M., and seating for lunch was almost complete in the dining car - it was full! I switched from Profoto monolights with softboxes, to two Canon 580 flashes because there was no room for the full sized softboxes with all those people in the dining car. The handheld flashes were attached to the new TTL PocketWizard Flex TT5 units, which work together via radio signals to create TTL flash exposures. One flash was bounced off the ceiling for fill, the other was pointed directly at the models.


The images were about two stops under exposed due to the backlighting from the windows. I could have bumped up the exposure compensation on the camera body one stop, and spit the difference between the models and the view, but I decided to use a HDR (high dynamic range) technique instead. During processing, I adjusted the exposure for the models, blowing out the highlights in the ocean view. I then used the same raw file, adjusted it for the ocean view, and opened it as well. I copied the entire picture with the darker ocean view, selected the window of the first exposure, and picked the Edit - Paste Into menu command. The darker, correctly exposed version of the ocean dropped into correct position. Although the models would have shown less noise if I had split the difference between the two exposures, Amtrak was using the image at about three inches across, so it was not an issue. Canon 5D, RAW, Aperture f11, ISO 500, Shutter speed 100/sec, shutter priority setting.

Picture Six


This is the first class waiting area. Beautiful pools of sunlight were streaming in the huge window, and I wanted to take advantage of the natural light, but still fill the harsh shadows. Two ProFoto compact monolights with softboxes were placed on either side of camera position, and turned slightly left and right. A third Profoto monolight with a 7 inch reflector was bounced off the ceiling on the right side of the bar, out of view. The forth Profoto monolight with a 7 inch reflector was placed just out of the image frame on the left side, next to the window. This forth light created a nice rim light on the hair of many of the passengers, but looked like it was just the sun coming through the window. Canon EOS 5D Mark II, f13, shutter speed 1/30 sec , ISO 640, Lens EF 17-40mm f4 USM at 22mm, Gitzo carbon 6X tripod with ball head.
Dennis Davis Photography


A location shoot like this requires a huge amount of preparation, planning and coordination. It was one of the most difficult shoots I have ever done, but I loved it. Photography is my passion, and doing a shoot like this was a labor of love.

Keywords: lifestyle photography los angeles, advertising photography Los Angeles, how to photography tips, lifestyle advertising photographers Los Angeles, Los Angeles food lifestyle advertising photography, production stills, production photography, location photographers Los Angeles, Dennis Davis Photography

Dancing with the Panda


I recently did an architectural photo shoot for Panda Restaurant Group, which operates Panda Express, Panda Inn and Hibachi-San Japanese Grill. Panda Express has 1285 restaurants covering 38 states and Puerto Rico, and the photo shoot was of the "model restaurant" next door to the corporate headquarters. The images were used initially for 5 foot tall prints at a trade show, and brochures.

Although my 13 mega pixel Canon 5D would have made good 5 foot prints, I wanted them Panda to be thrilled with the print quality. I purchased a 21 mega pixel Canon 5D Mark II camera right before the shoot, so I was able to deliver 60 megabyte files instead of 36 megabyte.

We did the interior photography with the camera tethered to a Macintosh laptop, so the managers from Panda were able to make instant decisions about camera angles, lighting, etc. As the trade show requiring the prints was a week after the shoot, they wanted the interior images right away, so I took the laptop next door to their corporate headquarters and delivered edited high resolution TIFF files to their in-house graphic designer, then went back to the restaurant to shoot twilight and night-time exteriors.

www.DennisDavisPhotography.com
This Panda Express restaurant is located next to a Walmart, so it is extremely busy. They didn't want people in the shots, so we planned the interior photography to be from 2:00 pm to 4:00 pm, hoping for fewer people. Even during this slower time, we still had 40-50 customers per hour come in. We encouraged the customers to sit at tables on the side where we were not shooting at the time.

www.DennisDavisPhotography.com
The most difficult shot was of food serving bar. We had to do a 1/6 second exposure to get the flat screen menu displays to show up, and match that light to the existing room light and the strobes. When we got the light right, we would have the cooks fill the serving bowls over the top so the food would be seen in the foreground of the picture, and clean the Plexiglas shield to spotless perfection. Then 10 customers would come in, and ask for Orange Chicken and Broccoli Beef - items we had closest to the camera - and we would have to ask for more to be made and clean the Plexiglas again before we could take the shot. An exercise in patience!

How the image of the food bar was done

A ProFoto compact flash mono light with a 7 inch reflector and a 20 degree grid was placed in the kitchen behind the food counter, very low, pointing at the Orange Chicken and Broccoli Beef in the foreground. This defined the food, and made it shine and look wet. A second ProFoto mono light with a medium softbox was placed to the left of the food bar, as high as it would go. A third mono light with a softbox was placed behind the camera, and high, pointing down. All images were taken using a tripod.


The lights were adjusted to minimize reflections on the Plexiglas shield, and a polarizing filter was used to remove additional reflections. The first test exposures were done without the strobes firing, so I could get a baseline exposure of existing light. As the menu was several flat screen TVs mounted above the food, the baseline exposure had to be long enough to capture the screens, or they would be black. The screens were selected and lightened in post production. Final exposure was f10, 1/6 of a second, at ISO 500. I was concerned that a longer exposure would cause the screens to change, and a higher ISO would create noise, so I felt this was a good compromise.

Friday, January 8, 2010

Seven tips for shooting in natural light

Photography by Dennis Davis Photography


Although artists have used light coming through a window to light their subjects for centuries, the most famous artist to use natural window lighting was the Dutch artist Rembrandt Harmenszoon van Rijn (July 15, 1606 – October 4, 1669). In photography books, when an author refers to Rembrandt lighting, they refer to soft, broad, natural light coming strongly from one side, and leaving the opposite side of the face in shadow. This is not direct sunlight, but rather light from the sky, preferably the northern sky or "north light". This is a beautiful look, and creates mystery in a portrait that makes it intriguing. See http://en.wikipedia.org/wiki/Rembrandt for Rembrandt painting examples.


Direct sunlight creates very "hard" distinct, dark shadows, with a very hard edge going from light to dark. Portraits done in direct sunlight without a reflector or flash fill can look very harsh and have too much contrast. There is no detail in the shadow areas at all. In contrast, sky light coming through a window creates a very soft edge, and as light turns to shadow it is very gradual. This soft look is very flattering, and classic Rembrandt lighting is something that every professional photographer should master. Rembrandt lighting can and should be imitated using artificial lighting, but it can never match natural north light.

North light coming through a window is not very bright compared to direct sunlight. You will need to do several things to compensate for the low light levels.


1. You will need to use a tripod. Often shutter speeds for natural light photography go as low as 1 or 2 seconds. The slowest you can hand hold a camera without visible shake is 1/30 of a second. Using anti-shake or "image stabilizer" lenses can help reduce vibration, but there is no substitute for a steady tripod.

2. Increase your ISO setting. The default ISO for outdoor photography is 100, which on many digital cameras is the lowest setting, and creates the least amount of noise. Digital cameras continue to improve, and each year the cameras allow higher and higher ISO settings, making the camera more sensitive to light, but producing less noise (grain, visible pixels) in the picture. I often use a setting of 400 or 800 ISO with my Canon 5D, and have no fear of producing a unusable file.


3. Work with a model that is willing to move slowing, and freeze upon command. Many years ago I sat for a portrait for an album cover taken on 50 ISO 4" x 5" film. The only light was coming through a stained glass window in a church. Exposure times ranged from 1 second to 10 seconds! I had to sit without breathing, swaying, blinking, or moving in any way for up to 10 seconds at a time! That length of time is no longer necessary due to the low noise levels in recent digital cameras. However, even 1/2 second is still a very long time to sit still without moving. If you subject blinks during the exposure, their eyes will look blurry.
Tell your model to listen to your count, and to freeze on the count of 3. They should take a half-breath, hold it, and yet have a un-posed, very natural and comfortable expression on their face. This is not an easy thing to do, and more experienced models and actors will often be better at this than first timers.


4. Use a reflector on the shadow side of your model. If what you are shooting is a portrait of the model, you will want to try some of the images with window light only so you can have the dark shadows on one side of their face. However if you are selling something - clothing, props, products, etc, you will want more control over your lighting. Using one or more reflectors can fill the shadows, and make what you are selling easier to see. Reflectors can be white, silver, gold, or zebra, i.e. gold and silver or gold and white, and from 2 feet across for the face only, to 4' x 6' or larger for full body fill. Do not over fill the shadows, or the lighting will be too flat and boring. The light on the window side of your subject should be 2 -4 times brighter than the shadow side.

Photographers often use gold reflectors to "warm up" the photographs, and make it friendlier. This "warming" of the color temperature can also be done in photo editing software such as Adobe PhotoShop, however a gold reflector only warms the shadow side of the person, which is the bluer or cooler side anyway.


5. Use flash fill. I did say fill, not "use flash as your primary, or key light". Using flash that's more powerful than the natural light will give you flat, unnatural looking light. No, you will want the natural light to be 2 -4 times stronger than your flash. Many studio lights do not have power settings low enough to be 2 or 3 stops less than the natural light. If you want to use studio lights for fill, look for ways to reduce the light output, such as by adding neutral density gels, or multiple diffusers, or bouncing off a back wall. However, I have had good result by using my on-camera flash on manual output settings. I put my camera on a tripod, take a light meter reading or take a trial photograph and check the historigram on the back of the camera. Once I feel I have a good exposure setting with the natural light, I add my on camera flash, usually at 1/4 or 1/8 power setting, and bounce the light off the ceiling or a white wall. Do not use colored walls for this unless you want those colors reflecting on your subject!


6. Warm your color temperature up in your photo editing software. Skylight is very blue, often 6,500 to 9,000 Kelvin, compared direct sunlight at noon, a very white 5,000 - 5,500 Kelvin, or direct sunlight at sunrise or sunset, which can be very yellow or orange, at 3,200 - 3,500 Kelvin. Portraits taken in natural light often look blue, or cool. If this is what you are looking for, great, leave it alone. However, many photographers prefer "warmer" tones, more golds, browns and yellows in their portraits. If you shoot your portraits in "RAW format" instead of jpeg, your photo editing software should offer you a sliding scale where you can adjust your color temperature. Click on something pure white in the picture with your white balance tool to get a starting point. Then shift the slider up towards the higher numbers to make the picture "warmer" or more yellow / gold, or towards the lower numbers to make it look "cooler" or more blue. Try color temperature settings of 6,000 - 7,500 and see if you like the warmer look.


7. One of the more popular looks today is with a window appearing in the picture, with the highlights over exposed, or "blown out". Many photo editing books will tell you to set the whitest point in your picture at 230 (on a scale of 0 - 255), that any whiter and there is no detail in the whites. This is an excellent rule for standard commercial photography. However, one current fashion is to break this rule, and allow the windows to go pure white in areas, or totally blown out at 255. A dappled look with tree leaves outside the window going from very light green to white is a favorite of mine. This "high key" look works well with subjects that are dressed in white or soft pastel colors. It looks very soft and romantic, and is great for brides, babies, pretty girls, and couples.


Add out of focus areas, or blur the areas around the model, and you have a very soft, dreamy look. One portrait photographer I know puts a clear or UV filter in front of his lens, and smears a light coat of Vaseline around the outside edge of the filter, leaving the center clear. This creates a soft, blurred vignette around the edge of the picture, and is very flattering to your subject. Of course, many camera companies sell "soft focus" lenses, however none of them are as cheap or as flexible as a jar of Vaseline! Tilt/Shift lenses and "Lensbabies" are also excellent for creating out of focus highlights in natural light portraits.

Natural light is beautiful coming through a window, but you can also get similar effects outdoors. Find a building with a porch, and put your subject just under the overhang of the roof, close to the edge. Buildings with columns or arches are particularly wonderful for outdoor natural light portraits. Have your subject lean against a column or archway. All the same principles apply - use northern skylight, reflectors, flash fill - but you will need to pay more attention to your background. When you become a master at Rembrandt lighting, you will be on your way to becoming a true artist and not just somebody who "snaps pics."


See my website http://www.dennisdavisphotography.com/ for more examples of natural light photography.