 |
| DennisDavisPhotography.com |
 |
| www.DennisDavisPhotography.com |
Amtrak to Santa Barbara
A "How to" blog about location LifesStyle Advertising photography.
In March, 2010 I got a phone call from an Amtrak employee asking for a quote and my interest in shooting a two day project for their brochures and photo library. The shoot would be at Los Angeles Union Station on day one without models, and on the train from Los Angeles to Santa Barbara with 10 models. As we talked about the project, I became more and more excited about the artistic and portfolio possibilities of the project, but I knew I was in for one of the biggest challenges of my 30 year photographic career.
We would be shooting in Los Angeles Union Station, one of the top three busiest train stations in the US. We would be shooting passengers as models recruited on the spot, with hundreds of other passengers seemingly bent on getting into and ruining our pictures.
It was one of the most difficult, but rewarding photo shoots of my 30 year career. Difficult because I had to light and shoot models (but with no room for light stands during much of it) on a moving train with Amtrak employees and passengers bumping into me. Rewarding because I was able to shoot in the beautiful and amazing Los Angeles Union Station. It involved ten models, two assistants, 15 locations, 4 Amtrak managers, multiple conference calls, and me to pull it all together.
Casting for models consisted of invitations sent to over 40 models on www.ModelMayhem.com and an open casting for models over 60 years of age on www.CraigsList.org. Casting calls were held in various Hollywood area Starbucks. We were not given a budget large enough for agency models, and preferred models with some acting ability.
Day one was at Union Station, where we recruited real passengers to interact with Amtrak employees. We shot people buying tickets, red caps helping with luggage, the first class lounge, and various "beauty shots" of employees. The best shot of the day was in taken in a large hall that used to be used for ticketing, but is now rented out for movie and television production. It has ceilings that soar almost 70 feet, with arched windows that go almost the full height of the room. We put three conductors in full uniform in a patch of sunlight, filled the shadows with two strobes, and came away with a timeless image.
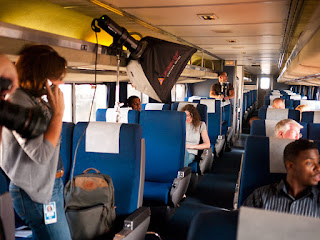
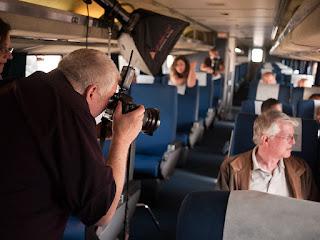
Day two on the train was intense! Up at 3:45 AM, at the train station at 5:00 AM, shooting on the train started at 6:00 AM with the models. We wanted to get as many shots finished as possible that didn't require scenery, as when the train pulled onto the platform at 10:30 AM to go to Santa Barbara, it would fill with passengers. The aisles on in most areas of the train are 30 inches wide, so there was no room for light stands at most locations. My two assistants held ProFoto Mono lights with softboxes up in the air, while others were placed on seats or bounced off the ceilings.
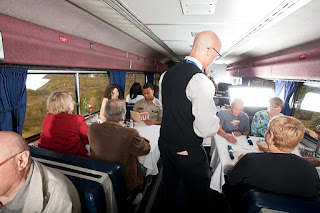
The crazy part came as we approached the station in Santa Barbara. We were shooting in the dining car, as it had very large windows, and we wanted to capture a view of the ocean behind the models. We only had a 10-15 minute time window when the ocean would be fully visible, so we had to get it right the first time. About 45 minutes before we got to the ocean view, the dining car was half full. Our models, assistants and gear was taking up about 6 booths.
The dining room wait staff told us we had to empty more tables, as they needed to seat the passengers for lunch. As we approached the ocean view, we were down to one table, and had to send the other models to another car. There was no longer room for the studio lighting with full size softboxes, as the assistants had to stand in the 30 inch aisles with passengers and waiters trying to go around them! I had just purchased two radio controlled Pocket Wizards, a new version that can control on camera flash units.
I used two hand held Canon 580 flash units, on camera, the other bounced off the ceiling, to light the models and fill the shadows coming through the windows. The entire time I was shooting the segment with the ocean view, there were waiters and passengers bumping me from behind. They weren't being rude, there's just not much room in the dining car aisles, and I am a big man! Although it was one of the most challenging shoots of my career, the resulting images made me feel like I had done a good day's work.
Picture One
This picture works on several levels. It is an architectural image, a corporate image and could be nudged a little and be used for advertising. The sun coming through the windows was the key light, and I didn't want to take away from its beauty, I only wanted to add a little detail with fill lights. There were three ProFoto compact flash Monolights used to light this image. A head with a softbox was placed against the wall on the left side, filling the wall on the left and the front of the four men. A second light with a bare 7 inch standard reflector was placed against the back wall and pointed at an angle towards the ceiling. This provided light for the ceiling and back wall, and overall fill. The final light was immediately to the right of the men, just out of frame, and was a 7 inch reflector with a 10 degree grid. This added detail to the right side of the men, but had to be kept at low power to keep from taking away from the sunlight. Canon 5D Mark II, ISO 100, f13, shutter speed 1/5 sec, Gitzo carbon fiber tripod, lens EF 17-40 mm f4 USM.
Picture Two
 |
| LifeStyle Advertising Photography by DennisDavisPhotography.com |
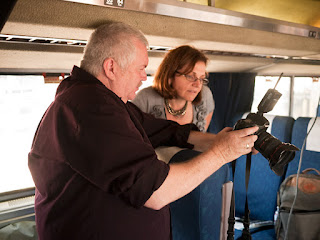
Lighting illustrations were taken by an assistant with a point and shoot camera.
Picture Three
 |
| Dennis Davis Photography |
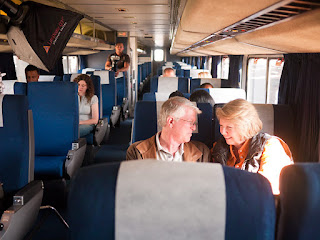
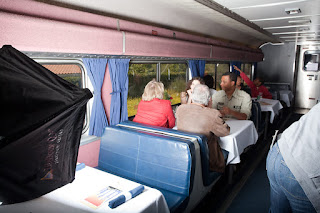
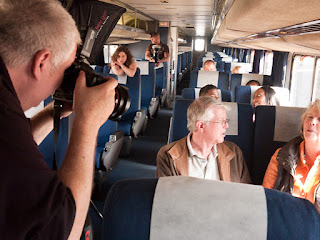
Picture three was done while we were still at the train yard, before the train went to the platform to load on passengers. This is why you can see a light stand in lighting illustration A, and it was the only location where we were able to fit a light stand - the rest of the locations required that assistants held the lights. Three lights were used, the first pointed at the models in the foreground of the picture, the second aimed at the models in row two, and the third was as 7 inch reflector bounced off the ceiling about 6 rows back. Camera Canon 5D, RAW, Aperture f16, ISO 640, Shutter speed 100/sec, Lens EF 17-40mm f4 USM
Picture Four
Lighting illustration C and D show the location of the 2 softboxes used for this image, the third was a monolight with a softbox bounced off the ceiling in the back corner of the car . Canon 5D Mark II, Lens EF 17-40mm f4 USM, f8, shutter 1/200 sec, ISO 400.
Picture Five
About 15 minutes before arriving in Santa Barbara, beautiful ocean views appeared out the left side windows of the train. It was about 12:30 P.M., and seating for lunch was almost complete in the dining car - it was full! I switched from Profoto monolights with softboxes, to two Canon 580 flashes because there was no room for the full sized softboxes with all those people in the dining car. The handheld flashes were attached to the new TTL PocketWizard Flex TT5 units, which work together via radio signals to create TTL flash exposures. One flash was bounced off the ceiling for fill, the other was pointed directly at the models.
The images were about two stops under exposed due to the backlighting from the windows. I could have bumped up the exposure compensation on the camera body one stop, and spit the difference between the models and the view, but I decided to use a HDR (high dynamic range) technique instead. During processing, I adjusted the exposure for the models, blowing out the highlights in the ocean view. I then used the same raw file, adjusted it for the ocean view, and opened it as well. I copied the entire picture with the darker ocean view, selected the window of the first exposure, and picked the Edit - Paste Into menu command. The darker, correctly exposed version of the ocean dropped into correct position. Although the models would have shown less noise if I had split the difference between the two exposures, Amtrak was using the image at about three inches across, so it was not an issue. Canon 5D, RAW, Aperture f11, ISO 500, Shutter speed 100/sec, shutter priority setting.
Picture Six
This is the first class waiting area. Beautiful pools of sunlight were streaming in the huge window, and I wanted to take advantage of the natural light, but still fill the harsh shadows. Two ProFoto compact monolights with softboxes were placed on either side of camera position, and turned slightly left and right. A third Profoto monolight with a 7 inch reflector was bounced off the ceiling on the right side of the bar, out of view. The forth Profoto monolight with a 7 inch reflector was placed just out of the image frame on the left side, next to the window. This forth light created a nice rim light on the hair of many of the passengers, but looked like it was just the sun coming through the window. Canon EOS 5D Mark II, f13, shutter speed 1/30 sec , ISO 640, Lens EF 17-40mm f4 USM at 22mm, Gitzo carbon 6X tripod with ball head.
 |
| Dennis Davis Photography |
A location shoot like this requires a huge amount of preparation, planning and coordination. It was one of the most difficult shoots I have ever done, but I loved it. Photography is my passion, and doing a shoot like this was a labor of love.
Keywords: lifestyle photography los angeles, advertising photography Los Angeles, how to photography tips, lifestyle advertising photographers Los Angeles, Los Angeles food lifestyle advertising photography, production stills, production photography, location photographers Los Angeles, Dennis Davis Photography


