Translate

Friday, January 23, 2009

How to buy Lighting Gear and Equip a Home Photography Studio

www.DennisDavisPhotography.com

Lighting is by far the most difficult thing to learn about photography, and makes more difference in a photograph then any element besides the subject. The word "photography" comes from the Greek (phos) "light" + (graphis) "stylus", "paintbrush" or (graphĂȘ) "drawing", together meaning "drawing or painting with light." Lighting takes years to learn to do well, and there are hundreds of books written on the subject. This article will only scratch the surface on the topic, but there are links and book references at the end that will give you direction on where to look for more information.

Your eyes have a much greater ability to adjust to the differences between light and shadow than film or digital sensors do. Your eyes can look at a bright area of a landscape, but also take in all of the details in the shadow areas of that landscape. Film and digital sensors cannot. If you expose for the bright areas, the shadow areas will not have enough detail. If you expose for the shadow areas, the bright areas will be over exposed and the highlights blown out. The ability of a camera to capture a wide range of light levels is called dynamic range. A typical point and shoot or entry level digital SLR (single lens reflex) camera has a dynamic range of 6 f stops. A medium format digital back such as a Phase One or Leaf can have a dynamic range of 12 f stops. But even with these more expensive (up to $32,000 for the digital back alone) camera systems, the dynamic range cannot come close to matching that of your eyes.

Reflectors - Cheaper and as Effective as Lights

Much of photographic lighting is designed to deal with this problem of dynamic range. Because a digital sensor cannot capture both the bright areas and the dark areas of a picture at the same time, photographers will add a “fill light” to soften shadows and make them less dark. The simplest and cheapest light you can buy is not a light at all, but rather a reflector. My first reflectors as a beginning photographer were bought at Kmart or Wal-Mart, and were just sheets of white, gold or silver poster board – cost, $2.00. More professional versions of reflectors are the round collapsible reflectors found in photography stores, by companies such as Westcott or California Sunbounce.

The way that these reflectors are used outdoors is by having your subject stand with the sun lighting one side of their face, and bouncing the light from the reflector into the shadow side of their face. Experiment with the placement of the sun and the reflector – sun directly behind the person, left or right behind the person. Then have them face directly into the sun, and have them hold the reflector at waist level to bounce the light back into the shadows on their face.

Indoors photographers use various reflectors for different purposes. Some photographers make reflectors called “flats”. These are often 8 feet tall and 4 to 10 feet wide, and often can fold down the middle so that they can stand by themselves without support. Calumet makes a reflector system with PVC pipe frames that are 8’ x 4’ that have legs to make them stand. Fabric can be purchased to go on the frames in white, silver, gold, black, translucent, and various other colors.

You can make your own diffusion flats and reflectors if you wish. Diffusion flats are usually white cloth over a frame, or just hung from light stands or the ceiling. Lights are put behind the diffusion flat, and the cloth softens the light and makes the shadows have a soft edge. Reflector flats are often made of two pieces of foamcore or sheet rock painted white. The two 4’x 8’ pieces are attached so that they can form a V shape, and thus be free standing.
PhotographerInLosAngeles.com

The ways these large reflectors are used are simple. The main light goes on one side of the subject, and the reflector goes on the other side to fill the shadows. The main light could be from a window, a continuous light source such as a tungsten or household light bulb, or from a strobe. Usually the light source is defused through a softbox, umbrella or cloth to soften the light, but hard light with a reflector is nice, too.

Product photographers use reflectors as well, but they tend to be much smaller and more controllable. Some product photographers bounce light where they want it with small mirrors. I have made a system of reflectors out of silver “mirror” cardboard that I bought at an art supply store. I cut the paper into long strips between 4” and 10” wide, then folded them to make triangles that would stand on their own when taped or glued. Although these work well, I prefer LightRight reflectors as they are more adjustable due to their sliding magnets on the back.
http://www.PhotographerInLosAngeles.com

I use a system of small reflectors that come from LightRight for food and product photography. These are cardboard silver reflectors made with a shiny silver surface on one side, and a white surface on the other side. The reflectors have a sliding magnet system that allows me to angle the light anywhere I wish. I usually use two strobes with softboxes, and one hard light focused through a grid (a round metal disk that allows light to pass through a honeycomb pattern, focusing the light and keeping it narrow). I usually will bounce the light from the hard light back into the shadow side of the product with a LightRight reflector.

Don’t own any photography lights? You can do product photography with just window light and three or four LightRight reflectors. Defuse the window light with a white sheet or curtain; place your product on a paper or cloth background, then bounce the light from the window into the shadow side of the product with your reflectors. It works great!

Types of Lights Used in Photography

There are two main categories of lights used in photography, continuous lights and strobe or flash. Some photography instructors suggest that a beginning photographer start with continuous lights to learn how light works, then advance to strobes after they gain confidence. In the continuous light category, there are tungsten lights made by companies such as Lowel and Photoflex costing about about $500 to $1.200 for a basic kit.

The advantages of tungsten lights are as follows:

  • As with all continuous lights, you can clearly see where the light and shadows fall. You can add lights and reflectors to make the lighting setup you need.
  • They are bright, affordable, and a good choice if you are shooting something that will not be bothered by the heat, and that doesn’t move. In other words, products , furniture and items to be sold on eBay are good prospects for tungsten lights
  • If you want to shoot both video and still photography, tungsten is a good choice


The disadvantages are as follows:

http://www.PhotographerInLosAngeles.com
The color temperature is 3200 degrees Kelvin, which is an orange colored light. Although by doing a good white balance on your digital camera you can compensate for this in a dark room, in a room lit with sunlight you will come up with difficult lighting situations.

They are very hot. You can burn yourself easily, make people sweat and their makeup run, and make food dry out and melt. Use gloves when handling hot lights.

They are not as bright as flash, and do not stop action. You will need to work at larger apertures with less depth of field then flash, or work at higher ISO ratings (thus more noise in your pictures) than flash.

Even cheaper then tungsten lights, photo floods by makers such as Smith Victor A basic lighting kit can be had from stores like B and H Photo or Calumet for $250 to $500. Photo floods can be 3200 Kelvin or 4800 Kelvin depending on if you use the white or blue colored lights. They work mostly like tungsten lights, but the bulbs have shorter life spans, and the kits have fewer accessories available. If you are just starting to experiment with lighting, just want simple lights for product photography, or if you work black and white, these might be a good choice for you.

The better and more expensive type of continuous lights are daylight balanced fluorescent lights. These lights are cool, can be used in daylight, and have a soft beautiful light. However, they are not very bright, and it takes large and expensive light banks to meet many photographic requirements. Makers of daylight balanced fluorescent include Kino Flo, Calumet and Photoflex. Photoflex has lights that can use both fluorescent and tungsten bulbs, making them much more versatile. As fluorescent lights cannot produce hard light, some photographers mix strobe with fluorescent daylight balanced lights for a unique look.

Flash

Strobe lights are the choice of most professional photographers, for the following reasons:
  • The stop action well, freezing the subject so that the subjects are not blurred in the picture
  • They are cool, as they are only on while the picture is being taken
  • They are daylight balanced, so there is no problem with white balance on your camera, and you can use them in situations where there is window light mixed with your strobes. Unlike tungsten or photo floods, you can also use them out of doors to fill the shadows caused by bright sunlight.
  • Most professional flash units have tungsten modeling lights, thus you have the advantage of both types of lights in one unit. The modeling lights allow you to see where your lights are falling, and make decisions about how many lights to use and where to place them.


In addition to the obvious on-camera battery powered flash units, there are two main types of studio flash units – those linked to a power pack by cables, and mono lights which have the power generator built in. Some of the more popular makers of strobe units are Bowens, Broncolor, Dyna-Lite , Elinchrom , Photogenic, Profoto, Speedotron. Some inexpensive but powerful mono light strobes are made by White Lightning, and are very popular with beginning professionals. Most photographers prefer to use power pack units in the studio, as adjusting lighting ratios is easier when you don’t have to physically go to each light separately as you would with mono lights. Mono lights are more practical for location work, as you can put them a wide distance apart, and hide them easily within a setting.
http://www.PhotographerInLosAngeles.com

Light Modifiers

The secret to great photographs is lighting control. Light modifiers allow you to put the quality of light where you want it, and keep it away from where you don’t want it. The following are light modifiers commonly used with flash in a commercial photography studio.

Softboxes: built like a dome tent, these light modifiers soften and defuse the light, taking the hard edge off of shadows. They have a reflective surface inside such as white or silver, and one or two pieces of cloth over the light for diffusion. Softboxes are the most important light modifier tool you can buy as a commercial photographer, but they are often overused, resulting in photographs that are flat and featureless.
www.DennisDavisPhotography.com

Softbox grids: These are cloth honeycomb modifiers that fit on the front of a softbox. They keep the light from going where you don’t want it, and make the light travel in a straight line.

Reflectors: These are metal cone-shaped modifiers used for reflecting hard, undiffused light, or for bouncing light into an umbrella or off or through a light panel. Reflectors come in various shapes and sizes, and can focus light in broad or narrow angles.

Beauty dishes: Although it is technically a reflector, it has a shield in front of the flash bulb that bounces the light back into the dish. It is a broad, hard light often used in fashion and portrait photography.

Reflector grids: These are metal disks that fit on the front of reflectors. They have a honeycomb pattern that allows the light to pass through, but in a more focused, narrow beam. Grids come in various degrees, such as 10, 20, 30 and 40 degree grids, with the higher number being a broader beam of light. Grids are useful for hair lights, rim lights, back and side lighting with food and products, and can keep lens flare from ruining your picture.

Barn doors: These fit over a reflector, and have doors on them that can open or shut, keeping the light off of areas where you don’t want it.
http://www.DennisDavisPhotography.com

Snoots: Focuses the light in a narrow, round beam

Umbrellas: Hugely popular with portrait photographers for years, they have been replaced by softboxes in many photographers toolbox. However, they are inexpensive, and you can shoot through them for soft, defused light, or bounce light off of them for a little harder light. They come in white, silver and gold. They do not have the control of a softbox, as the light goes everywhere.

Flags: These are black cloth stretched over a metal frame. They are used for keeping light off of areas, such as when you use a color gel on your background light and don’t want white light to dilute the color. If you are trying to create shadows in your picture, flags are very useful.

Gels: Colored semitransparent plastic film that goes over a reflector or light to change the color of the light. Warming gels are very popular in fashion and glamour photography, red, blue and purple gels are often used in annual report and industrial photography. Many photographers will put a colored gel on their background light, so that the background fades from one color to another.

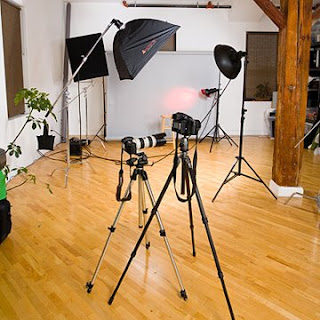
Building and Equipping a Home Studio

The space you use should have white walls, otherwise you will make color casts on your photographs. You should be able to get the room totally dark, perhaps by putting blackout cloth over the windows. This is to see what you lights are doing. Ceiling height of 10 feet or higher is best, but if you have your taller portrait subject to sit rather than stand you can get away with an 8 foot ceiling. Home studios are often built in garages or spare bedrooms. A 12’ x 14’ bedroom is big enough for tabletop photography and portraits of one person, a 16’ x 20 garage can be used for portraits with two or three people, table top and most other kinds of studio photography.

Basic Home Photography Studio Equipment list
  • Sturdy tripod
  • Background stand (two light stands with a pole on top of them is typical)
  • A light stand for each light you have
  • Two or more lights
  • Two softboxes (preferred) or two umbrellas (cheaper)
  • Two reflectors for your lights, and two grids
  • Reflectors as needed
  • Folding table for tabletop photography
  • Background paper and materials
  • Metal clamps (large clothes pin style)
  • Camera
  • Computer and photo editing software

Basic Beginning Professional Photographers Equipment List
  • Sturdy tripod
  • Background stand (two light stands with a pole on top of them is typical)
  • 5 to 10 light stands (at least two Matthews C stands to be used to hold flags)
  • 3 to 6 lights
  • 3-5 softboxes of various sizes
  • Two grid reflectors
  • One beauty dish (if you plan to do fashion or portraits)
  • Folding table for tabletop photography
  • Background paper and materials
  • Carrying cases for location work
  • Various reflectors and diffusers
  • 3-6 flags of various sizes
  • Gels
  • Metal clamps (large clothes pin style)
  • Gaffer tape
  • Cinefoil (matte black aluminum material to modify light)
  • One barndoor
  • 1-3 snoots
  • At least two cameras (what if one fails on an important shoot?)
  • 3 or more lenses (I use a macro, 17mm – 40mm zoom and 24mm to 105mm zoom the most on my Canon DSLR)
  • Textured materials for product photography – stone, bamboo, wood, rocks, art paper
  • Computer and photo editing software

My professional studio is equipped with 14 studio strobes, 16 light stands, 8 softboxes, 50 or more reflectors, 10 flags, etc. I use a Profoto D4 power pack with 4 light heads as my primary studio light, and 4 Profoto mono lights on location. At times I shoot a big enough area on location that I have to take all of my lights - about once a year. I have a battery powered Speedotron system with 2 heads that can produce 1500 watt seconds of light without being plugged in. It is great for shooting in the park or on the beach, or in industrial settings without power. See becoming a professional photographer for more information.

Websites about lighting and photography

http://www.photoworkshop.com/ This is an amazing resource, you could spend weeks here and not cover everything.

http://www.photoflexlightingschool.com/ Great lighting training, but really plugs Photoflex products.

http://photo.net/ Good general photography information.
Books on photographic lighting

The Lighting Cookbook: Foolproof Recipes for Perfect Glamour, Portrait, Still Life and Corporate Photographs (Photography for All Levels: Advanced) by Jenni Bidner and Jen Bidner

Professional Portrait Lighting: Techniques and Images from Master Photographers (Pro Photo Workshop) by Michelle Perkins
http://www.DennisDavisPhotography.com

Light: Science and Magic: An Introduction to Photographic Lighting by Fil Hunter, Steven Biver, and Paul Fuqua

The Complete Guide to Light & Lighting in Digital Photography (A Lark Photography Book) by Michael Freeman

Posing and Lighting Techniques for Studio Portrait Photography by J. J. Allen
And for advanced photographers one of my favorites

Lighting and the Dramatic Portrait: The Art of Celebrity and Editorial Photography by Michael Grecco

Starting a home studio
How to Start and Operate a Digital Portrait Photography Studio by Lou Jacobs

The Business of Studio Photography: How to Start and Run a Successful Photography Studio by Edward Lilley

How to Become a Fashion Model

By Dennis Davis Photography


Although there is modeling work in every major city in the world, most of the models that work full time in the USA either live in or regularly visit New York, Chicago, Miami or Los Angeles. The fashion capitals of the world include Paris, France, London, England and Milan, Italy. If you are good enough, companies will pay for your travel expense as well as your time.

Modeling jobs fall into 3 main types: runway work, video work and print work, but all modeling is about selling a product or service. With runway work, you will be modeling shoes, jewelry or clothing. Although there is runway work available for children, plus size and older models, most runway models are tall, thin ladies ages 15 to 35 and between 5’ 8” and 5’ 10”, and tall athletic men with defined bodies and 6 pack abs, between 5’ 10” and 6’2” ages 15-35. Runway work pays the least, but in many cities it is regular – some department stores host fashion shows every week. You can expect $50 - $150 per hour for runway work when you are starting out in most major cities.

Much of video work is for television commercials, although models are used on TV shows as extras, or in movies. Some models take acting or public speaking classes so that they can get speaking parts on the commercials, which pay more. You could be selling anything – cars, boats, appliances, makeup, furniture, clothing, food, beverages – the idea is to show the product in use, and to make the product or service desirable. Sex sells and the sexier the model, the more attractive the product looks to the viewer. A television commercial that will be aired nationally could pay thousands or even tens of thousands of dollars. However, if it is for a local, small town car dealer, don’t expect that kind of money.

Print work can be for catalogs, websites (not print but usually the same images are used for both), magazine advertisements, magazine articles, billboards, product brochures, posters, greeting cards, etc. Makeup, hair care and clothing companies use models extensively to make their products look desirable. Even cheap, bad makeup will sell if a super model is used to promote it. Print work for clothing catalogs is very regular, and some models specialize in specific types of clothing, such as men’s suits, or women’s underwear. You should know what your best feature is, and go after jobs that show off your best attribute. If you have really great hair, go after shampoo and hair dye jobs, not shoe catalogs. Fashion magazines do not pay as much as advertising work, but they can get your face in front of advertising clients where you can make more money.

Print work usually pays $150 - $300 per hour for models with an agency new to the business. Experienced models can make $3,000 - $5,000 a day with catalog and advertising work. However, international brand hair, makeup, perfume, designer clothing companies could pay “super models” upwards to $100,000 per day to appear in their ads. However, there are only a very few models making that kind of money, and you would have to be really awesome and a good business person to get there.

Models are also hired for trade shows and business events, the thought being that beautiful women will attract business men to the booth so that the salespeople can present their product to them. Grand openings of stores, buildings, shopping malls, etc. can provide work.

Getting Jobs

There are two ways of getting jobs as a model, finding jobs on your own, or having someone else do it for you. Many models start out promoting themselves, and then work with an agency as they become more experienced. Getting a good agency to represent you is difficult, as they can only represent a small fraction of the people that want work. There are also lots of bad agencies out there – so be careful!
Being a model is a business, and you are the product! Products must be put in front of potential buyers in an attractive manner, and offered at a reasonable price. If you are promoting yourself, you need to be willing to do the marketing and selling of yourself, and this means working at it every day! The internet has made getting your face in front of potential buyers easier, and you need to have a profile on several major modeling websites. Popular ones include:
http://www.modelmayhem.com/
http://www.newfaces.com/
http://www.musecube.com/
http://www.onemodelplace.com/

Many of these websites offer free portfolios, and offer “upgrades” for a fee. The upgrades may include higher placement in searches, more photographs in your portfolio, more emails per day available, etc. Many websites offer listings of “casting calls” or modeling jobs, as well as modeling agencies that are seeking new models. A part of your job as a model promoting yourself is to check these listings regularly, and go to interviews and casting calls.
http://www.DennisDavisPhotography.com

The second method of promoting yourself is to research companies that use models, and make sure they have your photographs and contact information available when they are hiring. Models use “zed cards” or “comp cards” to promote themselves. These cards usually have 3-6 pictures of the model, as well as statistics such as clothing sizes, shoe size, hair color, height, weight, etc. Contact information should include a phone number and email address, as well as web links to your portfolios. You should also include a business card and 8” x 10” or 8.5” x 11” headshots in your marketing mix.

Companies in your city that should have your card include advertising agencies, photographers, department store chain headquarters, magazines, catalog companies, commercial photographers (wedding and family portrait photographers are a waste of time), clothing, shoe and makeup companies, and any other organization that you know uses models. With the largest and most promising companies, you should call to find out who to mail your card to, send your card, then follow up with another call and try to make an appointment to show your portfolio to the client.

Joining a good modeling agency is very difficult, but can mean success or failure for your modeling career. A good modeling agency can find regular work for you, and send you on all expense paid trips around the world. Modeling agencies want to know you are serious about your work, and expect to see images in your portfolio from several photographers before they hire you. They prefer to see published work in your portfolio, tear sheets from magazines and catalogs are best. Modeling agencies take a percentage of the fee they charge the client for your time, usually ranging from 15-25%. They will send your card out to potential clients, and put your image on their website or in their catalog.

Bad Modeling Agencies, Watch Out!

Almost all modeling agencies require that you sign a contract with them. Many require an exclusive contract, where you can only do modeling on jobs that they get for you – and the contract could be for several years. If you sign a contract with an agency that is very large, they may have a few models that make them lots of money, and they ignore you. If you sign with an agency that is too small, they may not have enough models to interest large companies or advertising agencies. Beware of the lazy agency, that signs you up and never bother to promote you and get you work. You could waste the best years of your modeling career with one of these.

Then there are the agencies that lie to you and take your money. Some agencies have photographers, hair and makeup artists on staff, and require that you use their photographers to create your portfolio if you want to work with their agency. Do not sign with these agencies! Often they hire inexperienced photographers fresh out of school, and pay them little more them minimum wage, yet promote them as “professional photographers.” This is a rip off, and a scam. The pictures they produce are not good enough to show you at your best.

Some modeling schools advertise themselves as modeling agencies, but they make their money off the models, not clients. They will not get you regular work, they will empty your pocket, not fill it. That is not to say that you cannot benefit from a modeling school. They can teach you how to pose, walk the runway, and do your hair and makeup, and many other valuable skills. Just don’t confuse a modeling school with a modeling agency. If you want modeling classes, take them from the school, then find a real modeling agency that will get you work.

Bad Photographers, Watch Out!

Unethical photographers may try to seduce, rape or even murder you. Models typically by definition are attractive. Many years ago I met a guy claiming to be a photographer that would see an attractive lady in a bar, store or park and walk up to them and say “wow, you are really attractive, are you a model? I am a professional photographer, and I think you should be a model. You know, models can make hundreds of dollars per hour. Do you have a portfolio? I would be willing to help you put together a portfolio of modeling pictures for free if you would like.”
http://www.DennisDavisPhotography.com

Of course, it is very flattering to be told that you should be a model, and anyone with a computer printer and paper from an office supply store can make a business card that says they are a professional photographer. When the subject arrived at the photographer’s home, he would shoot some images of the model with clothes, and then suggest that they do “body shots.” Then he would say “wow, you really look hot! We should shoot some nude photos that show off everything you’ve got.” He claimed that over half of the women he used this technique with would end up in bed having sex with him. He was not really a photographer; he just did it as a hobby to get hot sex!

Other types of bad photographers are the ones that do not have the experience or skills to produce the quality photographs that you need, or they charge you high prices for prints, fancy portfolio books or other things you don’t need. You always need high resolution digital files on disk – if you have that you can make your own prints. Beware of hiring young photographers at high prices that don't have a client list that includes companys you know.Some photographers may charge you full price for shooting your images, then have you sign a model release and sell you pictures – or even sell your pictures without a release!

What Kind of Photographs do You Need?

Composite cards are usually 8.5” x 5.5” to 8.5” x 11”, and have 5 or 6 pictures on them. They can be designed various ways, but one common style is to have a large headshot on the front and four smaller pictures on the back. Some of the websites listed able have on-line stores where you can purchase comp cards. A typical comp card might have a swimsuit or underwear shot which shows your whole body, a high fashion shot, a casual shot and a formal shot in addition to the large headshot. Think about what your best feature is, and make sure that feature – your hair, your torso, your hands, your eyes – is shown clearly in one of the images. Many models like to show that they can have different looks on their comp cards, and their hair style and look changes in every picture. Other models know what their best look is, and show that alone.

Many photographers sell comp card and portfolio packages, and this is a great way to start building your collection of images quickly. However, a professional portfolio is a collection of the best of your best images, and cannot be shot in 2 or 3 hours – it would take more like 2 or 3 days, which could easily cost $4,000 to $10,000 using a top quality fashion photographer. Also, less experienced photographers only have one or two styles that they are good at, and so all of your pictures end up looking the same.

Depending on your best features, you might want images at the beach with first flash, then using reflectors, then with available light only. Then you would shoot at the park with the same lighting types, then downtown in first business and shopping areas, then in more gritty urban looking areas like an alley. You could shoot in your home or a friend’s, in a living room, kitchen or bedroom. In the studio, you would want to be photographed in front of various kinds and colors of backgrounds, with and without props, and with simple and complex lighting setups.

Studio lighting can give you lots of different looks; the main light can come from above, below, to the side, behind high, behind low, etc. Secondary lights and reflectors fill the shadows made by the main or “key light”. There are photography books on the market describing 50 – 100 lighting setups for shooting portraits, and each of these setups can give you a different look. I suggest you pay one really great photographer to shoot your most important shots, and then arrange to “test” with less experienced photographer who needs to build their own portfolios.

Many student photographers and those recently graduated from photography school need to build their portfolio, and offer to shoot models for free in exchange for using their images for their portfolio and / or stock photography. Some photographers who shoot stock photography for a living also will do TFP or TFCD shoots which means “trade for prints” or “trade for compact disk”. You may still have to pay to get the best photographer’s to shoot you, but working with various photographers will do several things for you:

  • You will learn to be more comfortable in front of the camera
  • You will learn what your best features are, and what expressions and sides you shouldn’t show
  • You will get lots of different “looks”, various styles, and lots of different settings
  • You will learn new poses, and how to work under pressure
http://www.DennisDavisPhotography.com

For your paid shots, ladies will want to visit a hair and makeup artist before the shoot, or have one at the shoot if the budget allows. Yes, men will also benefit from hair and makeup artists, particularly if they have skin imperfections or want to show different hair styles with each clothing change.

No matter what kind of model you are, you will need great pictures in your portfolio and on your comp card. Getting published work in your portfolio will give you more credibility and speed your acceptance by an agency. Contact small local newspapers, charities, small magazines and local clothing stores and volunteer to shoot for free, and leave your contact info.

For rates and package prices for model headshots, comp cards and portfolios contact Davis@DavisPhotographic.com or  call 213-434-3344

This article was written by Dennis R. Davis, copyright 2008. All rights reserved, no part of this article may be reproduced on a website or in print without written permission.

10 Tips for Taking Better Pictures of People

http://www.DennisDavisPhotography.com

1. Get closer to your main subject

Your photograph will be better if you make it about one main thing. Don’t try to get three people, the boat, the lake, the castle and the mountains all in the same shot. If you love all of those things make separate images for each subject. But if the subject of the photograph is people at a location, use the location as a backdrop for the people, instead of making the people tiny dark objects in front of a beautiful backdrop.

2. Turn your flash off when shooting landscapes, but on for people

If you are using a small on-camera flash, its effective range is about 12-15 feet. If you are shooting the Rocky Mountains, standing at the edge of the Grand Canyon, or photographing a basketball or baseball game, turn the flash off if possible. Leaving it on will cause the foreground of the photograph to be bright, and the background to be dark and underexposed.

However, if you are photographing people 12-15 feet from you standing in front of a large scenic area, leave the flash on in bright, sunny weather. The people are the main subject, and the flash will fill the shadows on their faces.

3. Look for good light

The word photography comes from the Greek and means, literally, “light writing.” Since you are painting with light, it is important to understand light and appreciate its beauty. Overcast and cloudy days are good for photographing people, because the light is soft and flattering, and your subject is not squinting in the harsh sunlight. Beautiful portraits can be made late in the afternoon with the sun low in the sky, and your subject facing into the warm sunlight. Scenics are often best when the sun is near the horizon, early morning or late afternoon.

Placing someone under an overhanging roof or just at the edge of the shadow of a tree can create a beautiful portrait. Place your subject just inside the shadow, and turn their face so that one side of the face is lit by skylight, and one side is in shadow. Try moving them closer and further from the edge of the overhang / tree shadow until you get the effect you want.

4. Carry or find a reflector
http://www.DennisDavisPhotography.com

A white wall or fence can often be used as a reflector, bouncing light into your subject’s face. Place your subject next to the wall so that the shadowed side of their face is lit by the light reflecting off the wall. Snow, white sand and other light colored surfaces can be used in the same way.
I often carry portable reflectors with me for outdoor photo shoots, made of fabric stretched on a collapsible frame. I have several with white fabric on one side, and silver or gold fabric on the other. These photography reflectors are very similar to the collapsible shades that people put in their car windshields to keep their car cool in hot weather. I sometimes use white or silver poster board when I don’t have my regular reflectors along.

To use a reflector, you can place your subject completely in the shade, and place the reflector in the sunlight and bounce light into their face. Or you can place your subject with the sun to their back or side, and bounce light from the reflector into the shadow side of their face.

5. Give people something to do

People talking to each other, interacting, playing with something or doing something are more interesting than posed pictures. Give children a toy or animal to play with and your pictures will become more spontaneous and fun. Capture adults hugging, kissing, working, walking, playing sports or other activities to make pictures come alive.
http://www.DennisDavisPhotography.com

6. Keep your camera steady

Plant both feet firmly, about a foot apart, and hold the camera with both hands. Press the shutter button gently. Whenever possible, support the camera on a tripod, a ladder, or place both elbows on the top of a chair, a wall or anything that doesn’t move. You will end up with fewer blurry photographs.

7. If you are using a zoom or telephoto lens, use a faster shutter speed

If your camera allows you to adjust the shutter speed, always use a shutter speed at least as fast as the length of your lens when you are not on a tripod. For example, if you are using a 200mm lens, use a shutter speed of 250 th of a second, or 125 th of a second for a 120mm. longer lenses amplify your body’s movements, and the faster shutter speed cuts down on the effect of camera shake.

8. Give your subject a mirror

If you take out a pocket mirror, often your subject will see that they need to comb their hair, fix their makeup, clean the stain off of their shirt, or take off their jacket that doesn’t match their top. You can also show them their picture on your digital camera and ask them if they see a way to improve the photo. This works much better than making a rude comment about how they look, and could get you a kiss instead of a kick in the pants.

http://www.DennisDavisPhotography.com
9. Place the main subject off center

Imagine the lines drawn for tic-tac-toe, or the # symbol. Imagine those lines drawn on your camera’s viewfinder. Place your main subject where one of those lines intersect, and your composition will be more interesting than if you place the subject dead center. This is only a guideline, and photographs with the subject in the center are not “bad pictures.” However, if you try this composition guideline you will like the results.

10. Look for a simple, uncluttered background

Try to keep other people, clutter, random cars or buildings out of the background of your photos. Move your subjects to a place with a simple background and good light before you take your pictures.

5 Tips for Photographing Nature


http://www.DennisDavisPhotography.com
1. Don’t be afraid of dramatic weather

Beautiful images can be made just before a rain storm, during foggy weather, in fresh snow or when really cloudy. During foggy weather, find some interesting shapes to put in the foreground, and let the mystery of the fog take over the remainder of the image. With rain storms or heavy clouds, make sure you have most of the sky unobstructed, with at least one interesting object in the foreground. Sunsets with heavy clouds can be particularly powerful.

2. If you love flowers and insects, buy a macro lens

In the 80’s I was once hired to photograph rhododendrons for Callaway Gardens in Georgia. I spent three days with my nose in amazingly beautiful flowers, in shades of purple, red, pink, and white. It was one of the most pleasant jobs I have ever had. I used a 50 mm macro lens on a Nikon 35 mm camera, and shot with Kodachrome film. The detail that the macro lens displayed was fantastic. You could see individual bits of pollen, and the tiny flower parts in rich color. I love detail, and when I am taking photographs of some small detail in nature, I feel like an explorer discovering a new country.

If your camera does not have interchangeable lenses, many camera companies create close-up attachments for point and shoot cameras. These often screw onto the front of the normal lens, and magnify the image.

3. When you see a beautiful sky, find something to put in front of it

When the sky is filled with beautiful light, a rainbow or an impressive cloud formation, move, drive or walk until you find something beautiful to put in front of it. The last thing you want is a picture of a scarlet cloud formation with telephone lines and retail stores in the foreground – unless you have a client paying you for that subject.

4. Take advantage of the properties of your wide angle lens

Wide angle lenses, including the wide angle settings on point and shoot camera zoom lenses, have the ability to focus on objects both near and far at the same time. Most people do not take advantage of this ability, and when photographing a beautiful vista only capture the distant scene. However, if you put an object close to the lens when you are photographing a vista, you will show a near / far relationship that will create more drama, and give the size of the vista more perspective. Examples of this near far relationship might be putting a flower in the foreground of a photograph of mountains, or putting a seagull or boat in the foreground of a picture of a beach.

5. Look for patterns, with one difference

Patterns are everywhere in nature, such as the scales on a snake, a peacock’s tail feathers, stripes on a zebra, cracks in dried mud. These patterns are beautiful, and always make interesting photographs. However, when you can find a pattern of similar objects with one thing different, it can make a statement about individuality or diversity. Examples might be a group of red leaves, and one yellow one, a group of black horses and one white one, or a pattern of small rocks and one big one.

Some of these tips were inspired by a document from Kodak

keywords: photo tips, photography tips, how to take better pictures, photography lessons, Ray of Light, famous photographer Dennis Ray Davis, learning photography, learn to take pictures, learn to use camera, photography classes, long beach photography, long beach photographers, 

An Insider's Look at Food Photography


Food photography is considered one of the most difficult specialties for professional photographers. There is a saying in the industry, “if you can shoot food, you can shoot anything.” The primary reason for this difficulty is how little time you have to shoot before the food looks like garbage. Within 1-3 minutes after putting a beautiful plate on a table to shoot, whip cream runs, wet food dries, fried food becomes greasy, ice cream melts, and steaming food doesn’t. Sometimes you only have time to get off 2-3 shots before the food is no longer at its photographic best.

So how do you achieve perfect composition and lighting with food that only looks good for a few moments? You use a stand-in. Set up all the real props on the table that are stable, such as napkins, glasses, silverware, flowers, etc. Then put in a substitute for the real food that looks as much like it as practical. If possible, place the stand-in food on the same color and style plate or bowl as the “hero” or real food item will be on. This way you can finalize your lighting, place your reflectors and check your exposure. If you are shooting digital or have a Polaroid back you can look at test images with the stand-in, and make adjustments to the arrangement and lighting then get approval from your client. When everything is perfect, bring in the hero dish and place it exactly where the stand-in dish was and shoot.

Food Styling Tips

My larger food clients always have a budget for a professional food stylist, and I have learned a lot from these food artists over the years. The food stylist creates the “hero” plate and often helps arrange props on the table, so that I can concentrate on my photography. However, many cookbook, magazine and smaller corporate clients do not have the budget for a stylist, and so the photographer’s skills are called upon.
One thing I always take to a food shoot is a bottle of glycerin and several sizes of artist’s paintbrushes, maybe several of different sizes depending on whether you want drops or a complete surface. Glycerin can be purchased from larger pharmacies. Food dries out quickly sitting on a table under 500-1000 watts of modeling lights, and the glycerin makes it look wet, shiny and fresh. I use glycerin on meat, fish, fresh and cooked cut fruit, and cooked vegetables – almost anything that should look wet and have lots of highlights. I have also seen stylists use vegetable oil or corn syrup for the same purpose, but neither of them last as long. Glycerin mixed with water and put in a spray bottle is also good for salads, salsas and other large areas where you would like long-lasting water droplets.

Steam and smoke make food look hot and appetizing, and can be created in a variety of ways. Cotton balls soaked in water and micro waved will give you up to one minute of steam. Dry ice placed behind the food item works well, but gives off more vapors if you place the dry ice in water. A cigarette or piece of incense is another option, but you must blow on the smoke to make it look natural like steam and not smoke. Some photographers have an assistant blow cigarette smoke through a straw placed behind the food. Movie prop and special effects supply houses sell smoke pellets that some food stylists use, but once again you must blow on it so that it is not so strongly directional. I have used all of these options, but have found dry ice and smoke pellets the most useful.

A small propane blow torch can be used for quickly melting butter on waffles, creating grill marks on meat, or reheating a skillet or wok without returning it to the stove. I requested a turkey prepared for a photo shoot once, and the food stylist painted the turkey with kitchen bouquet – a brown gravy base sold in grocery stores - and brown shoe polish, then browned the legs with a blow torch, and varnished it. It was photographed raw, but looked beautifully cooked and glossy, ready for Thanksgiving dinner!

Other tools;
Tweezers are used for moving and placing small food items.
Cotton tipped swabs are used for picking up crumbs and small liquid spills on plates.

Epoxy glue and super glue are used for assembling stubborn food items that won’t stay in place.
Fun tack is a type of sticky modeling clay that is used for placing under small items to keep them from moving.

Dulling spray is used on chrome or reflective items like silverware, to create a soft, even reflection without showing your soft boxes or umbrellas in the reflection. It can be found in larger photography stores.
Sandwiches, pastries and pies are often held together with toothpicks. The toothpicks may actually be photographed, and later removed in PhotoShop.

Fake Food

There is a law in the USA regarding truth in advertising that requires that advertisements about food show the actual food item that a consumer would be able to buy and eat. However, the food surrounding the item being advertised can be artificial, and food used to illustrate cookbooks or magazine articles can be bogus as well. It is often easier to work with imitation food that with the real thing.

For example, ice cream base is often made with mash potatoes, or with Crisco and powdered sugar plus food coloring that looks VERY real. Fruit pieces, chocolate chips or and food coloring are added to make various flavors. Cereal can be photographed with white glue instead of milk, because the cereal does not get soggy quickly, and the flakes stay where they are placed. Whipped cream might have thickener added, pies have glue holding them together, and vegetables that appear to be cooked are raw and touched with a blow torch and coated with glycerin to make them appear cooked.

Most of the ice cubes you see in drink shots are hand-carved acrylic, and almost all of the splashes in drink shots are free form acrylic made by a model maker. Yes, the photographer blasts the drink with compressed air or additional liquid to make droplets fly, but the primary splash above the glass is acrylic. Most alcoholic beverage shots have water added to them to make them more transparent so the back lighting will work better. Other drink shots are diluted tea or coffee, or just water with food coloring added.

Early in my career as a food photographer I decided to make an ice cream shot for my portfolio. I had read about using fake ice cream, but I wanted to find a way to use the real thing. So I bought 20 lbs of dry ice, called a food stylist friend, and we went to work. The food stylist took out a perfect scoop of ice cream and left it in the scoop. I hollowed out an area in the center of the flat side of the ice cream scoop, and placed a chunk of dry ice in the hollowed opening. Then I placed the ice cream on a plate, and stuck the plate on a slab of dry ice in an ice chest and left it there for an hour. While I got my lights set up, the stylist decorated a plate with yogurt swirls, and we were ready. I took the ice cream scoop out of the chest using gloved hands, and slid it onto the hero plate on the table and photographed it. I was using a Hassleblad CM 500, and shot two rolls of 120 film in about 10 minutes. The ice cream didn’t drip, melt, or move for the next half hour. It was so hard I think you could have thrown it at somebody’s head, and knocked them out with it!


Shooting Style


If you are shooting for a client, or shooting for your portfolio hoping to get a client someday, you should shoot the “safe, expected” images first, and get them out of your system. Maybe capture the overall shot from above, then standing height, then table height. After you are comfortable that you have captured what the client expects, start exploring. Look at the food arrangement like a landscape and you are a part of the Lewis & Clark team exploring the Pacific Northwest. You are looking for the most beautiful angle and the part of the arrangement that is the most appetizing. Get in tight with a macro lens, then shoot with a wide angle both up-close and then from further back. Shoot with a small aperture and everything tack sharp, then reduce your lighting power, open up your aperture and shoot with the background items out of focus. Find an image that you love, that makes you feel something. Make a shot that makes your mouth water, and makes you hungry. Shoot what you feel, and you are developing a style - people will pay you for your eye. Only shoot what the client asks for and expects, and you are a camera operator .


Lighting Tips


Food photography is generally done with studio strobe lighting, rather than tungsten or incandescent. The reasons food photographers use strobes is that they are cool, and do not affect the temperature of the food. Some digital food photographers use HMI or daylight balanced florescent lights, but strobe is still the most common light source. I shot about 85% of a recent cookbook project with strobe, and ten percent with daylight coming through defused skylights or windows, and controlled by reflectors or defused by tracing paper. The final five percent was with the tungsten modeling lights built into my strobes. I used tungsten when I wanted to show movement with a long exposure, or when I wanted to match the warmth and color a fire.
Light that is defused, directionless and shadow less is flat and lackluster. That’s one reason that overcast, cloudy days are not as cheerful as bright, sunny days. Light needs to have direction and cast shadows to be interesting. Many uncreative photographers place one large softbox directly over their subject, and shoot. Although this certainly cuts down on hot spots and specular highlights, it is also boring.

Most of my work is done with at least two and as many as eight lights. If you count the reflectors, there are sometimes as many as twelve light sources in my images. However, there is always one main or “key” light that has more power than any other light source. I always want to see the shadow cast by this light, regardless of how many lights fill those shadows. The correct placement of the key light can be determined by asking yourself the question “what is the most important feature of my subject, and what do I want to make sure people see? What is the main selling point I want to emphasize? Is it texture, shape or color?” Once you have answered that question for yourself, place your key light following the guidelines below.

The different lights I use as a key light are as follows:

  • A small softbox 2 foot by 3 foot
  • The same softbox with the front diffusion panel removed
  • A large softbox
  • A lamp head with a 7 or 9 inch reflector with a grid (a grid attaches to the front of a reflector and has holes in it to makes the light more directional and focused.)
  • A lamp head with reflector and barn doors
  • A lamp head with reflector pointed through a panel of tracing paper or diffusion cloth.
  • A lamp head with a snoot ( a device that fits on the front of the lamp head or reflector and creates a spotlight effect)
  • The sun low in the sky – usually defused through cloth or tracing paper
  • The sun coming through a skylight or window


If the texture on the top of the item is the most important, or if you want to show steam rising from the subject, put the key light low and behind the item and light from the rear. The light will rake across the textured top of the subject, and the shadows cast will emphasize the texture. In the case of steam or smoke, light from the rear shines light through the steam, making it bright white and draws the eye to it. Drinks are also usually lit from the rear, to bring out the translucent character and color of the liquid. I have used rear lighting for shooting pie with a crumb topping, steam rising from grilled chicken or coffee, and for water splashes.

If you are shooting soup or something wet and glossy, top lighting will create nice reflections and highlights. I have used top lighting for grilled meat, fruit salad, soups, cobbler and salsa. Softboxes usually work the best for top lighting. You will want a second light source with top lighting, usually coming from the front left or right. This could be a reflector or a second softbox.

Side lighting is useful when you want to show the shape of something, or to emphasize texture. I have used side lighting for a display of bread or pastry, and for raw fruit or vegetable arrangements.
I use lighting from the front and to one side or the other if I want to create bright highlights on the front of the dish, or to show its wetness or texture. I usually use side/front lighting for extreme close-ups or food macro images. I never put my key light directly in front of the subject at the same angle as the camera, as this creates flat, boring light shadows falling behind the subject. Besides, you want to make the food look like you just sat down to eat it, and light from directly in front of the food would be blocked by your body if you were sitting at a table.


Bottom lighting is used when I want to show light coming through my subject. I did a shot of a bottle of beer sitting in ice with bottom light. I had two wooden apple boxes set about two feet apart, with a piece of glass sitting on top of them. There was a clear refrigerator storage box full of ice on top of the sheet of glass. The beer was laid in the plastic box, and the ice placed around it. A lamp head with a snoot attached was on the end of a boom, and was underneath the set up pointed up towards the sheet of glass. The bottom light showed through the ice and the bottle, making the beer look cold, wet and refreshing. Without bottom light the ice looked dark and dirty, and the beer could not be seen.

Reflectors are vital to food photography. Beginning professional or amateur photographers with a budget for only one or two lights can create photographs with dozens of light sources by using reflectors. In addition to the large round reflectors sold in photography stores and large flat white foamcore sheets from art supply stores, tabletop photographers need many small reflectors. Small shaving mirrors can be used to pick up light and put it exactly where you want it; however, they are very bright and can create odd looking rectangular pools of light if not used carefully. Small pieces of aluminum foil can be shaped into reflectors and placed around the table, with either its shiny side or dull side out as needed.

The most useful small reflectors I have are those I have made from silver cardstock from my local art store. (See the side bar for construction details.) Place the tabletop reflectors where they pick up your key light, and bounce the light into the shadow areas of the food. Angle the reflectors so that they create glossy highlights in the wet areas of food. Use white reflectors for softer fill, silver for bright fill, mirrors for strong fill and gold for warm fill.


Table Top Reflectors


Indispensably useful reflectors can be made from cardstock found at your local art store. The paper that I use is a light 12 point card stock, shiny silver on one side, and white on the other. It is called “mirror silver” in my store. They also have mirror gold, which can be used for warming up an area of your photo.
You want to cut the paper up into strips of about 6 inches, 10 inches and 14 inches wide. You will want some tall strips and some short ones. You will then put three folds in the paper so that it forms a tall triangle, with a 1-3 inch flap at the bottom that can be taped to the inside of the triangle.

The reflector has to sit on a table by itself, so the base of the triangle needs to be large enough to support it. Changing where the flap is taped on the inside changes the angle of the front surface of the reflector. You can create white or silver reflectors by changing which side of the cardstock faces out.


Author Biography

Dennis Davis Photography is based in Long Beach, California and we shoot food photography anywhere in Los Angeles county, Orange County or Riverside County. Dennis Davis has shot cookbooks, restaurant menus, food packaging, retail posters and food advertising photography. See http://www.DennisDavisPhotography.com , http://www.PhotographerInLosAngeles.com and http://www.DavisPhotographic.com 

This article appeared in Shutterbug Magazine, and is on the Shutterbug web site at http://www.shutterbug.net/features/1204insider/index.html
Copyright Dennis R. Davis 2006. All rights reserved.

Thursday, January 22, 2009

Wyeth Pharmaceuticals


When I got the call to shoot an awards banquet for Wyeth Pharmaceuticals in January 2006, I had no idea who they were. It was not until I went on their corporate website that I saw that their brand names include Advil, Robitussin, Chap Stick, Preparation H and Primatene brands. The client wanted four types of shots:
Candid images during the cocktail mixer before dinner
Candid and group photographs of the employees at the banquet tables, talking and eating.
Photographs of achievers receiving awards, and in groups after they had all received them
Photographs of speakers and award presenters.

I used my Canon system with a 580 flash softened with a diffuser for the candid images during the cocktails, set at ISO 200 and f8 at 1/90. In the dinning room I set up 3 Photogenic monolights around the room, and the slaves triggered the monolights when the Canon flash went off. This evened out the lighting for the dining candid shots, and I was able to stop down to f11 when I was close to one of the monolights.
The speakers and groups were lit with the monolights only, and I switched to my Mamiya 645 AFD with the Phase One P20 back to photograph the groups of employees. The images are some of the best candids and group shots in my portfolio, and I was very happy with the results. Wyeth Pharmaceuticals accounting department told me that they plan to use me for the event again next year, and set me up as an authorized vendor.